You've made the decision to transform your garage with a professional Penntek polyurea floor coating. You've selected your colors, scheduled your installation date, and now you're wondering: what exactly happens during installation day? How long will the crew be at your home? When can you park in your garage again? What if something unexpected comes up?
These practical questions cause anxiety for homeowners throughout Bellevue, Sammamish, and Redmond who are preparing for their garage floor coating installation. Unlike multi-day epoxy installations that disrupt your home for a week, Penntek's same-day installation process allows you to return to normal life quickly—but understanding the timeline helps you prepare appropriately and know what to expect at each phase.
As the certified Penntek dealer serving the Seattle Eastside, we've completed hundreds of same-day installations across King County. This comprehensive guide walks you through every phase of installation day, from the moment our crew arrives until they complete your final walkthrough. You'll know exactly what's happening during each hour, why each step matters for long-term coating performance, and how to prepare your home and schedule for a smooth installation experience.
Your installation timeline actually begins about a week before the crew arrives at your home. During this pre-installation phase, several important activities ensure everything proceeds smoothly on installation day:
Color and Design Finalization: If you haven't already locked in your color selections during the initial consultation, now is the time. We confirm your decorative flake blend, base coat color, and finish preferences. Changes after this point can delay installation, so we ensure you're completely confident in your selections.
Garage Clearance Coordination: We provide detailed instructions about clearing your garage completely. Every item must be removed—vehicles, storage systems, workbenches, refrigerators, tools, and even wall-mounted items that might collect dust during grinding. Homeowners in Bothell and Woodinville often ask whether they need to remove heavy items like motorcycle lifts or major equipment. The answer is yes—we need complete access to the entire floor surface and walls.
Weather Window Verification: Pacific Northwest weather significantly impacts installation scheduling. Penntek polyurea performs well across a broader temperature range than epoxy (we can install in temperatures as low as 50°F), but extreme conditions still affect installation. We monitor the forecast for your installation date and contact you if weather necessitates rescheduling. This proactive approach prevents installation failures that result from applying coatings in unsuitable conditions.
Moisture Testing Results Review: If your initial consultation revealed moisture concerns requiring pre-treatment or specialized primer systems, we complete those preparations during the week before installation. Homes near Lake Washington or in areas with high water tables sometimes need moisture mitigation systems installed before coating application.
Final Logistics Confirmation: We call 24-48 hours before installation to confirm the crew arrival time, verify garage clearance completion, and answer any last-minute questions. This call ensures everyone is aligned on expectations and timeline.
Homeowners should complete these final preparations the evening before installation:
Complete Garage Clearance: Verify that absolutely everything has been removed from the garage. Check for items stored on high shelves, hanging from ceilings, or tucked in corners. The installation crew needs immediate access to begin work without delays.
Clear Access Path: Ensure the crew can easily access your garage from the driveway or street. Move vehicles parked in the driveway, unlock gates, and clear any obstacles. Our equipment is heavy—grinding machines can weigh 600+ pounds—and we need a clear path to transport equipment safely.
Notify Neighbors: Our grinding equipment generates noise comparable to a lawn mower or leaf blower. Most neighborhoods have noise ordinances permitting construction activity during daytime hours, but courteous notification prevents neighbor concerns. This consideration is especially important in close-proximity communities throughout the Seattle Eastside.
Secure Pets: Plan to keep pets away from the garage during installation. The noise, activity, and open garage door create stress for animals and safety concerns for the crew. Most homeowners keep pets in a separate room or arrange temporary pet care for installation day.
Arrange Personal Schedule: While you don't need to be home throughout the entire installation, being present for the initial walkthrough (first 30 minutes) and final inspection (last 30 minutes) ensures clear communication and approval of the finished floor.
Our certified installation crew typically arrives between 6:30-7:00 AM, weather and traffic permitting. Early starts allow us to complete installation before evening, giving the coating maximum cure time before you need garage access the following day.
Equipment Unloading (15 minutes): The crew unloads specialized equipment including commercial-grade grinders, HEPA filtration vacuums, crack repair materials, coating products, and application tools. Homeowners are often surprised by the professional-grade equipment we use—this isn't home improvement store rental equipment but commercial machinery designed for consistent, high-quality concrete preparation.
Initial Walkthrough and Inspection (15 minutes): This is when you'll want to be available. We conduct a detailed walkthrough of the garage, discussing any specific concerns, reviewing the color selections one final time, and identifying any unexpected conditions that might have developed since the initial consultation. We verify water heater and furnace locations, check door clearances, and confirm any areas requiring special attention.
Safety Setup (10 minutes): The crew establishes safety protocols including proper ventilation (we open garage doors and may position fans), dust containment measures despite our HEPA filtration, and clear work zones. Safety is paramount throughout every Penntek installation.
Final Surface Assessment (10 minutes): Before beginning preparation, we assess the concrete surface one final time, testing hardness, identifying any cracks that have developed or worsened, and checking moisture levels. This final assessment ensures we use appropriate grinding profiles and repair techniques for your specific concrete conditions.
The first active installation phase addresses any cracks, chips, or concrete damage that could compromise coating adhesion or appearance. This phase is critical—improperly repaired cracks represent one of the most common causes of coating failure.
Crack Assessment and Mapping: The crew walks the entire garage floor, marking every crack, control joint, and damaged area. Even hairline cracks invisible to homeowners get marked for repair. This thoroughness differentiates professional installations from DIY attempts where homeowners often miss minor damage.
Crack Routing (When Necessary): Some cracks require routing—using specialized tools to widen the crack slightly, creating a V-shaped channel. This routing allows repair material to penetrate deeply and lock mechanically into the concrete. Not all cracks require routing, but those showing signs of movement or those wider than 1/8 inch typically benefit from this additional preparation.
Mender HD Application: We use Penntek Mender HD, a specialized polyurea crack repair system that cures rapidly while remaining flexible. Unlike rigid epoxy crack fillers that crack again as concrete moves, Mender HD flexes with substrate movement while maintaining a waterproof seal. The crew carefully fills each crack, slightly overfilling to allow for the scraping and leveling that occurs after curing.
Cure Time: Mender HD cures sufficiently for grinding within 30-45 minutes, significantly faster than traditional epoxy repair materials requiring 24 hours. This rapid cure time enables same-day installations without compromising repair quality.
During this phase, homeowners often notice how many cracks actually exist in their "solid" concrete slab. Don't be alarmed—virtually all concrete develops some cracking over time. Proper repair during installation prevents these cracks from telegraphing through the coating or creating weak points where moisture might penetrate.
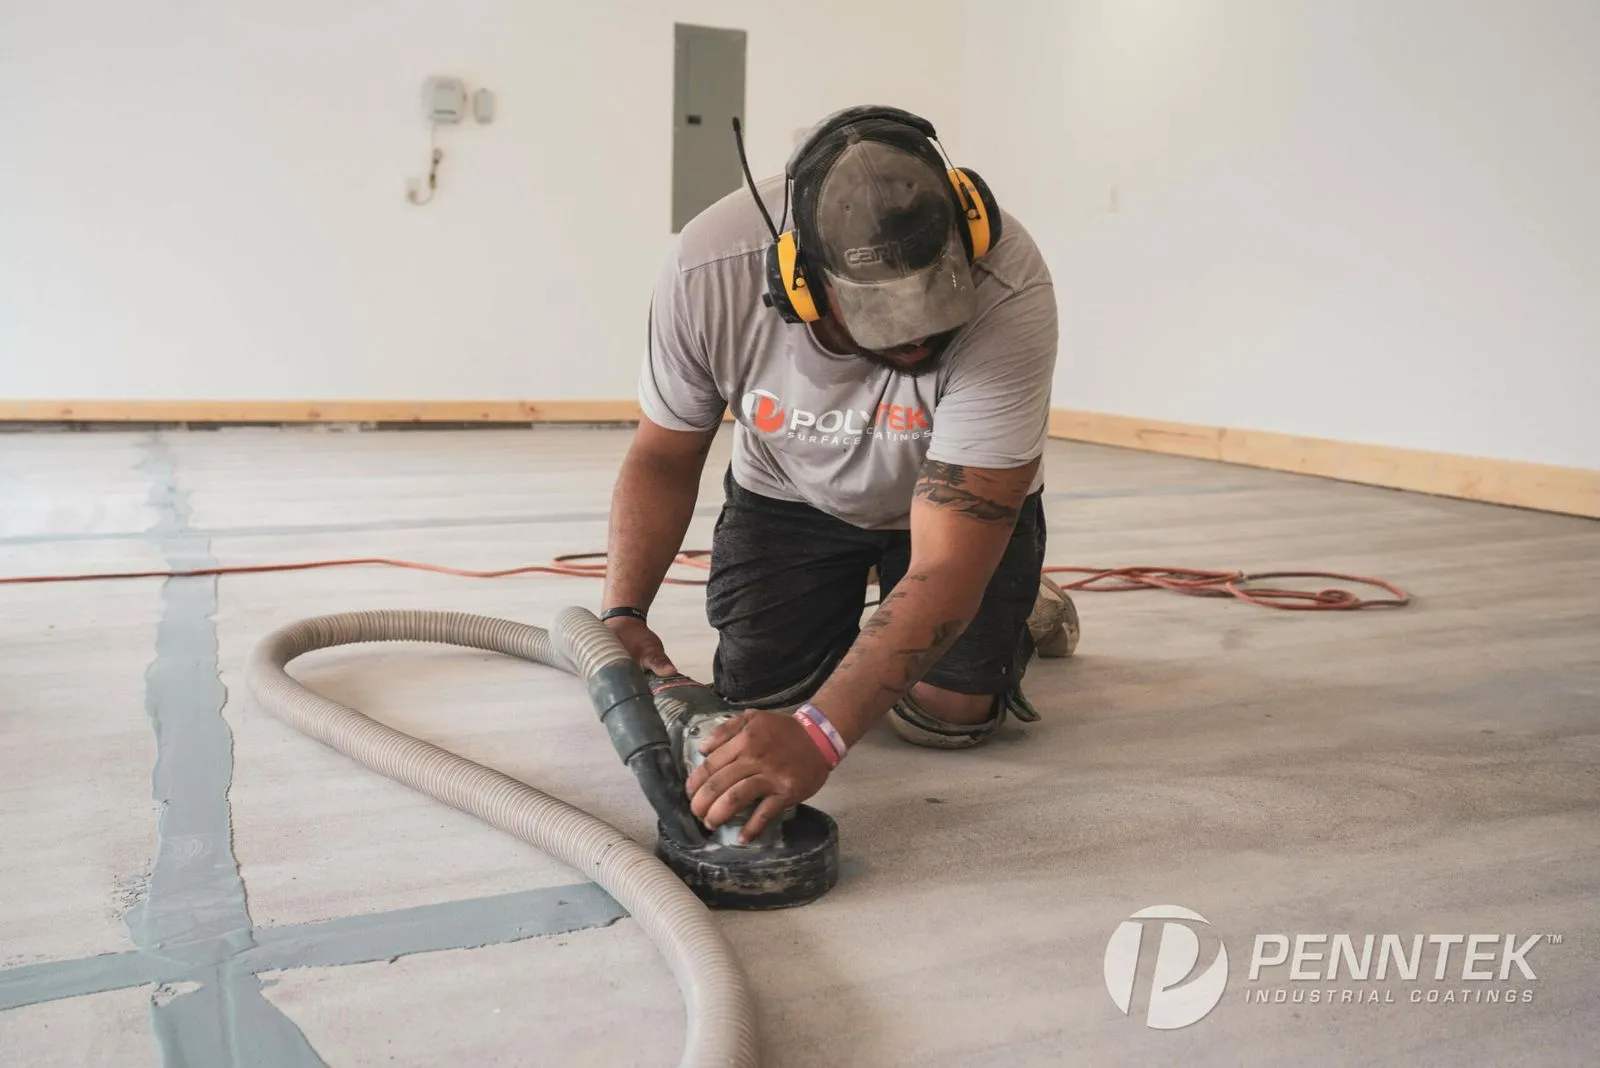
This three-hour phase represents the most critical part of your garage floor coating installation. Proper surface preparation determines coating longevity more than any other factor—even more than coating quality. Shortcuts during preparation lead to the peeling, bubbling, and premature coating failure that plague DIY installations and budget contractor work.
Initial Grinding Pass (60-90 minutes): Using commercial grinders weighing 600+ pounds and equipped with diamond cup wheels, the crew makes the first grinding pass over your entire garage floor. These machines aren't the 50-pound grinders available at rental shops—commercial equipment removes material consistently, creates proper surface profiles, and operates efficiently over large areas.
The grinding serves multiple purposes:
The grinding process generates significant dust despite our HEPA filtration systems. This is why we emphasize complete garage clearance—dust settles on everything. Our industrial vacuum systems capture 99.97% of dust particles, but some airborne dust is inevitable during this phase.
Edge Work and Detail Grinding (30-45 minutes): After the main floor grinding, the crew switches to smaller grinders and hand tools for edges, corners, and areas around posts or obstructions. Garage floor coating failure often begins at edges where preparation was insufficient. We grind right up to walls, door frames, and any permanent fixtures.
Crack Repair Leveling (15-20 minutes): Remember those crack repairs from earlier? Now that they've cured, the crew grinds over them, leveling the slightly-raised repair material flush with the surrounding concrete. This ensures crack repairs don't show through the finished coating as raised lines or ridges.
HEPA Vacuuming (30-45 minutes): After grinding completion, thorough cleaning becomes critical. The crew uses industrial HEPA vacuums to remove all grinding dust, paying special attention to edges, corners, and cracks. Any remaining dust prevents proper coating adhesion, so this cleaning phase receives meticulous attention.
Final Cleaning and Tack Wiping: After vacuuming, the crew tack-wipes the entire floor using clean microfiber pads. This removes the finest dust particles that vacuuming might miss. Some installations require solvent wiping in areas with persistent contamination.
During this preparation phase, homeowners sometimes worry about the noise, which is comparable to running a loud vacuum cleaner or using a circular saw. We typically start early to minimize neighborhood impact, and we're happy to take brief breaks if needed for work-from-home conference calls or other noise-sensitive activities.
With grinding and cleaning complete, we conduct a final inspection before coating application begins. This quality control checkpoint ensures the surface meets our standards before irreversibly committing to the coating phase.
Surface Profile Verification (10 minutes): The crew visually and tactilely inspects the grind profile, ensuring consistent texture across the entire floor. They check edge work quality, verify crack repair integration, and confirm that no areas were missed or under-prepared.
Final Moisture Check (10 minutes): We perform a final moisture test, particularly important for Seattle-area homes where rain and high humidity can affect concrete moisture content. If moisture readings exceed safe thresholds, we may use specialized primers or delay application—a rare occurrence but critical to prevent coating failure.
Temperature and Humidity Documentation (5 minutes): We record ambient temperature and humidity levels. These conditions affect coating application and cure rates. Documentation provides quality assurance records and helps troubleshoot the extremely rare cases where coating performance issues develop later.
Material Preparation (15 minutes): The crew prepares coating materials, measuring precisely and mixing according to Penntek specifications. Penntek polyurea products are two-component systems requiring specific mix ratios. Our certified installers use calibrated equipment to ensure exact proportions—improper mixing ratios cause coating failures, one reason DIY attempts often fail.
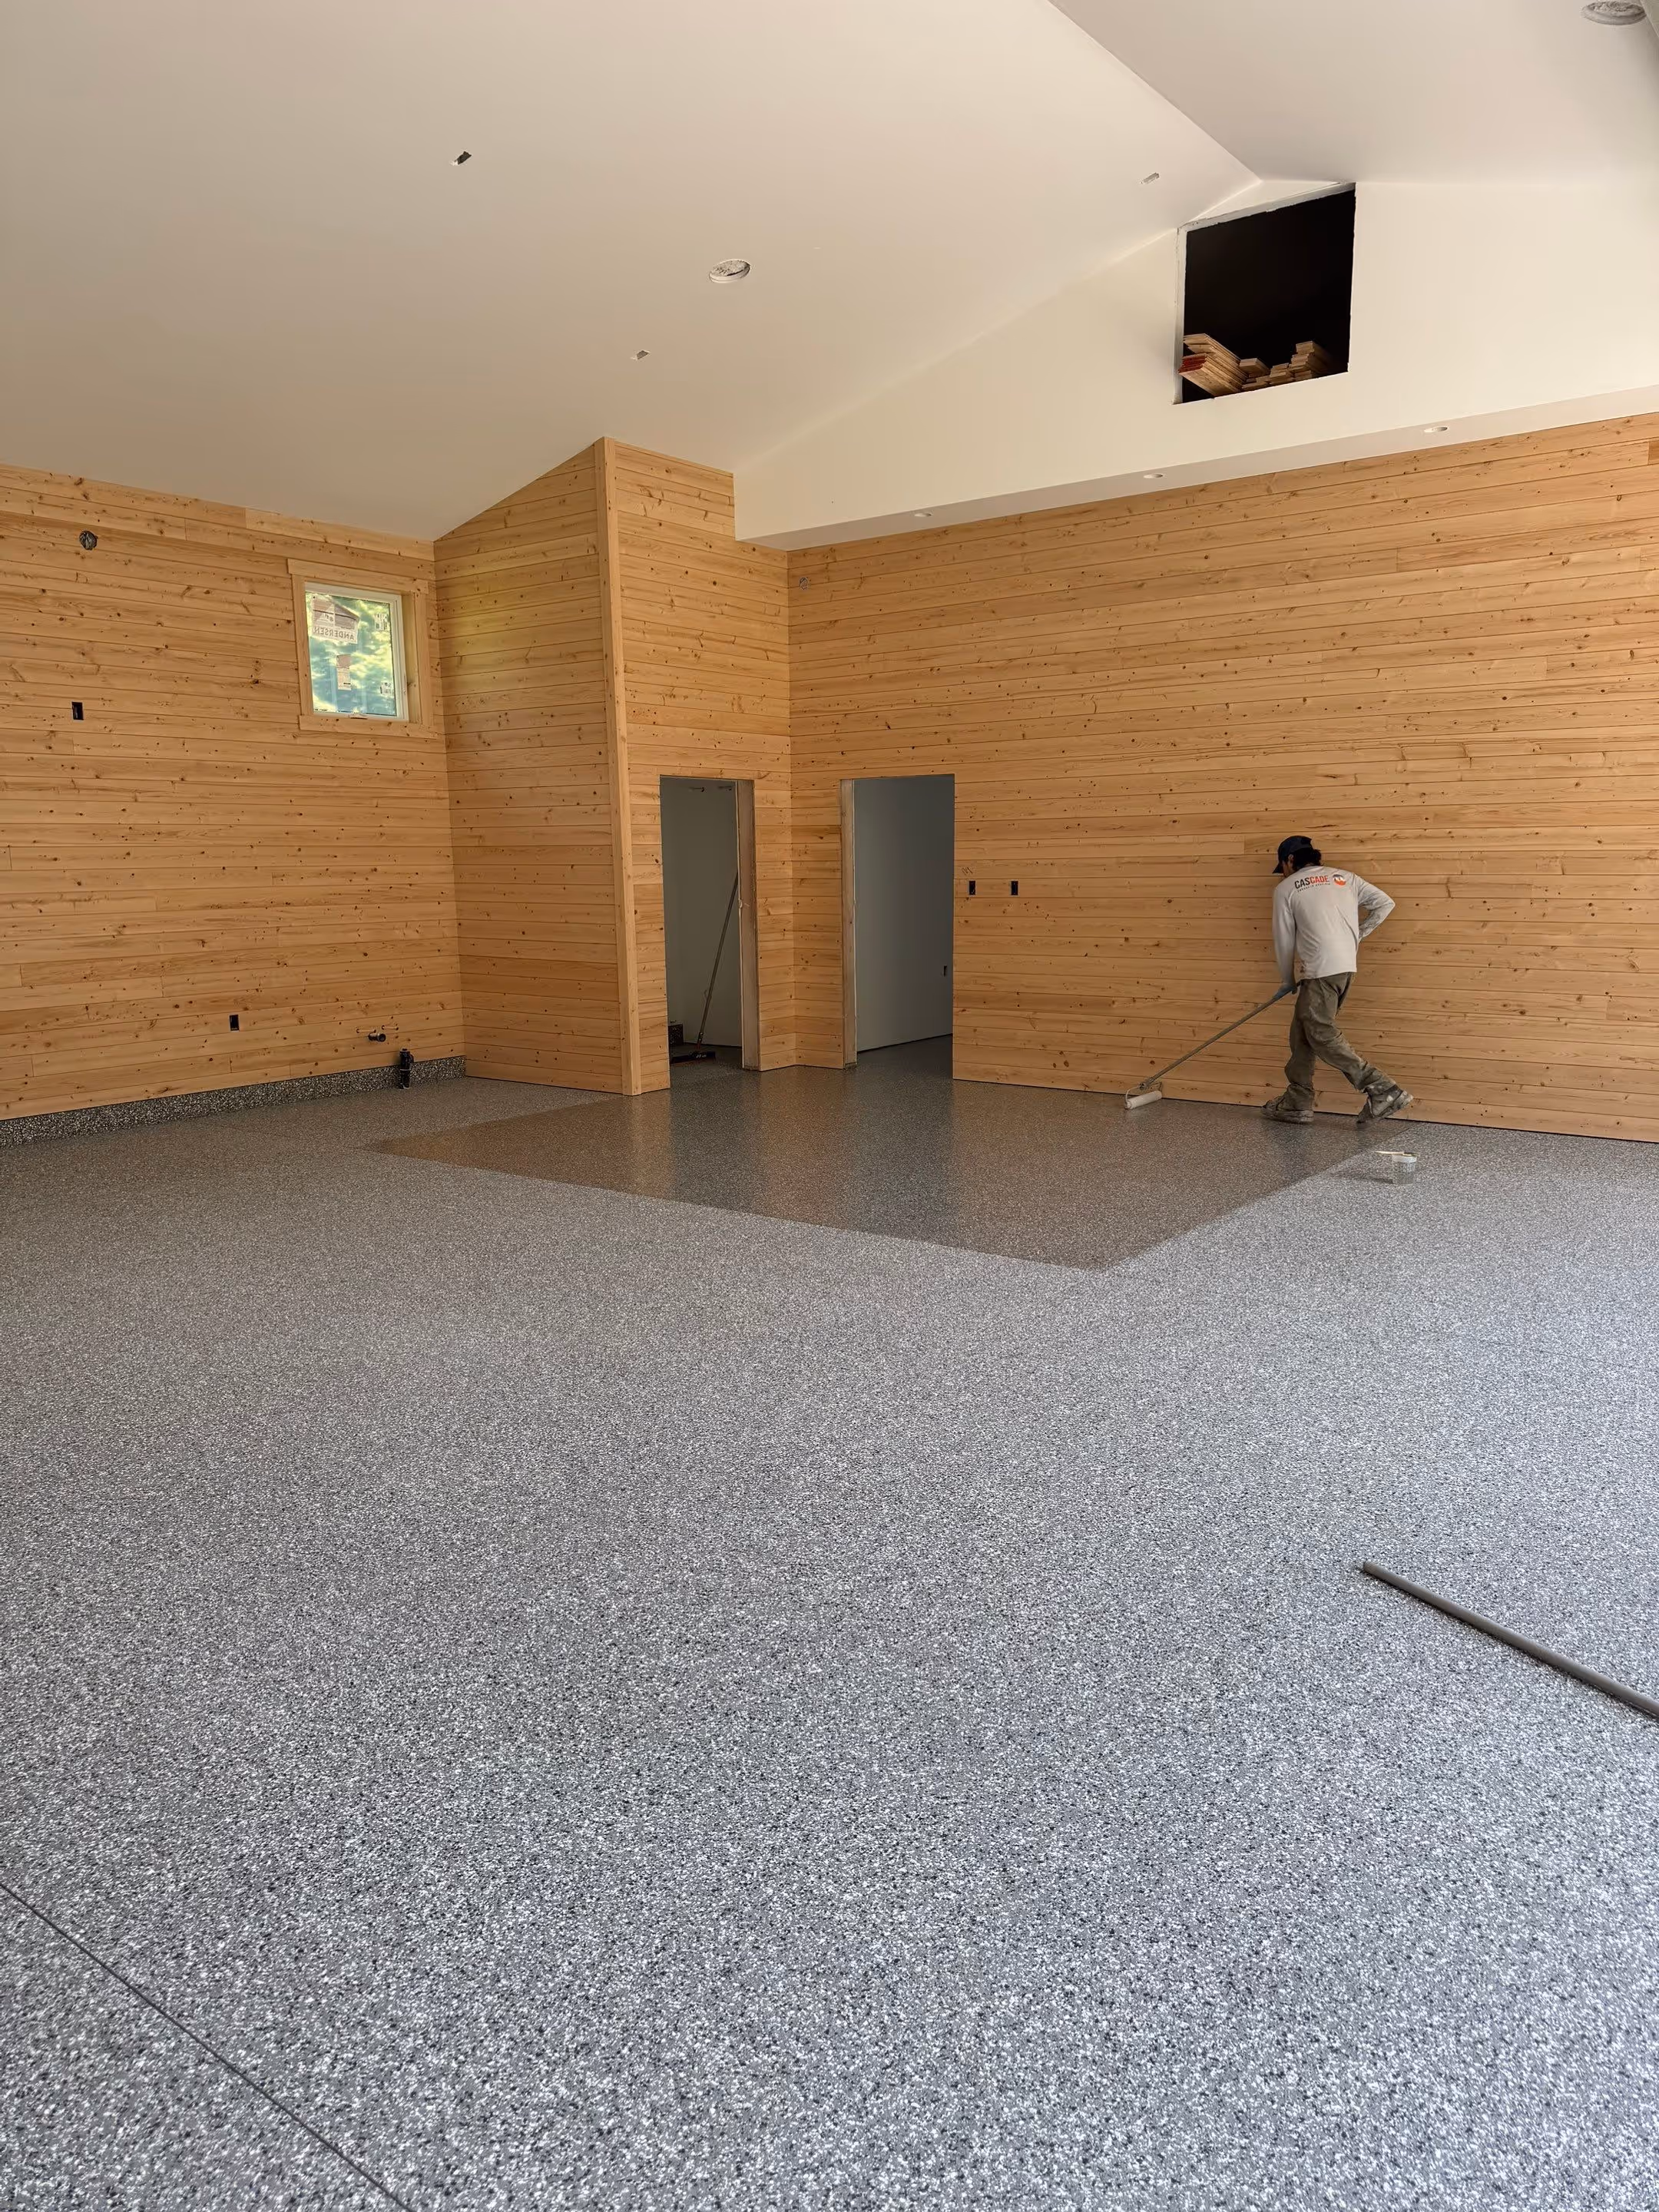
Now comes the exciting transformation—your garage floor changes from prepared concrete to a beautifully coated surface within 90 minutes.
Base Coat Application (30-40 minutes): Using specialized application tools, the crew applies Penntek's polyurea base coat in a consistent, even layer. Unlike epoxy that can be rolled on slowly, polyurea sets quickly, requiring experienced applicators who work efficiently while maintaining proper thickness.
The base coat isn't merely adhesive for decorative flakes—it's where the critical chemical bond with concrete occurs. Penntek's pure polyurea formulation penetrates into the concrete surface, creating molecular bonds that make the coating essentially part of the concrete. This chemical bonding prevents the peeling and delamination common with mechanically-bonded epoxy systems.
Homeowners watching this phase often notice how quickly it progresses compared to typical painting projects. Polyurea's rapid set time means we must work efficiently, another reason professional installation outperforms DIY attempts.
Decorative Flake Broadcast (20-30 minutes): Immediately after base coat application (while it remains tacky), the crew broadcasts decorative flakes across the surface. This isn't random tossing—proper flake broadcast requires specific techniques to achieve even coverage and the "full broadcast" appearance most homeowners desire.
The flakes serve multiple purposes:
Your color selection during planning determines the flake blend used. We carry numerous blends designed specifically for residential garages, from subtle neutral combinations to bold, colorful mixes.
Initial Base Coat Cure (30-60 minutes): After flake broadcast, the base coat needs time to cure sufficiently for the next phase. Penntek's rapid cure formulation means we only wait 30-60 minutes rather than the 24+ hours epoxy requires between coats. This waiting period is why same-day installations are possible with polyurea but impossible with traditional epoxy systems.
During this cure time, the crew takes a lunch break, cleans equipment, and prepares materials for the topcoat phase. This is also a good time for homeowners to take a lunch break if they've been watching the installation process.
After the base coat cures sufficiently, the crew returns to prepare the surface for topcoat application. This phase creates the final surface texture and ensures optimal topcoat adhesion.
Excess Flake Removal (30-45 minutes): During broadcast, we intentionally apply more flakes than will remain on the floor. This "full broadcast" technique ensures complete coverage, but excess flakes must be removed before topcoat application. The crew uses specialized scrapers to remove flakes that didn't adhere to the tacky base coat.
This scraping serves another critical purpose—it knocks down the tips of adhered flakes, creating a more uniform surface height. Without this scraping, floor texture would be extremely aggressive, uncomfortable to walk on barefoot, and difficult to clean. Proper scraping creates texture that's slip-resistant without being uncomfortably rough.
Second Vacuuming (20-30 minutes): After scraping, another thorough HEPA vacuuming removes all loose flakes and any dust generated during scraping. The surface must be completely clean before topcoat application—any debris gets encapsulated in the topcoat, creating surface imperfections.
Edge Detail Work (15-20 minutes): The crew inspects edges and corners, removing any excess base coat that may have built up and ensuring flakes are properly adhered right to the walls. Edge quality significantly impacts the professional appearance of the finished floor.
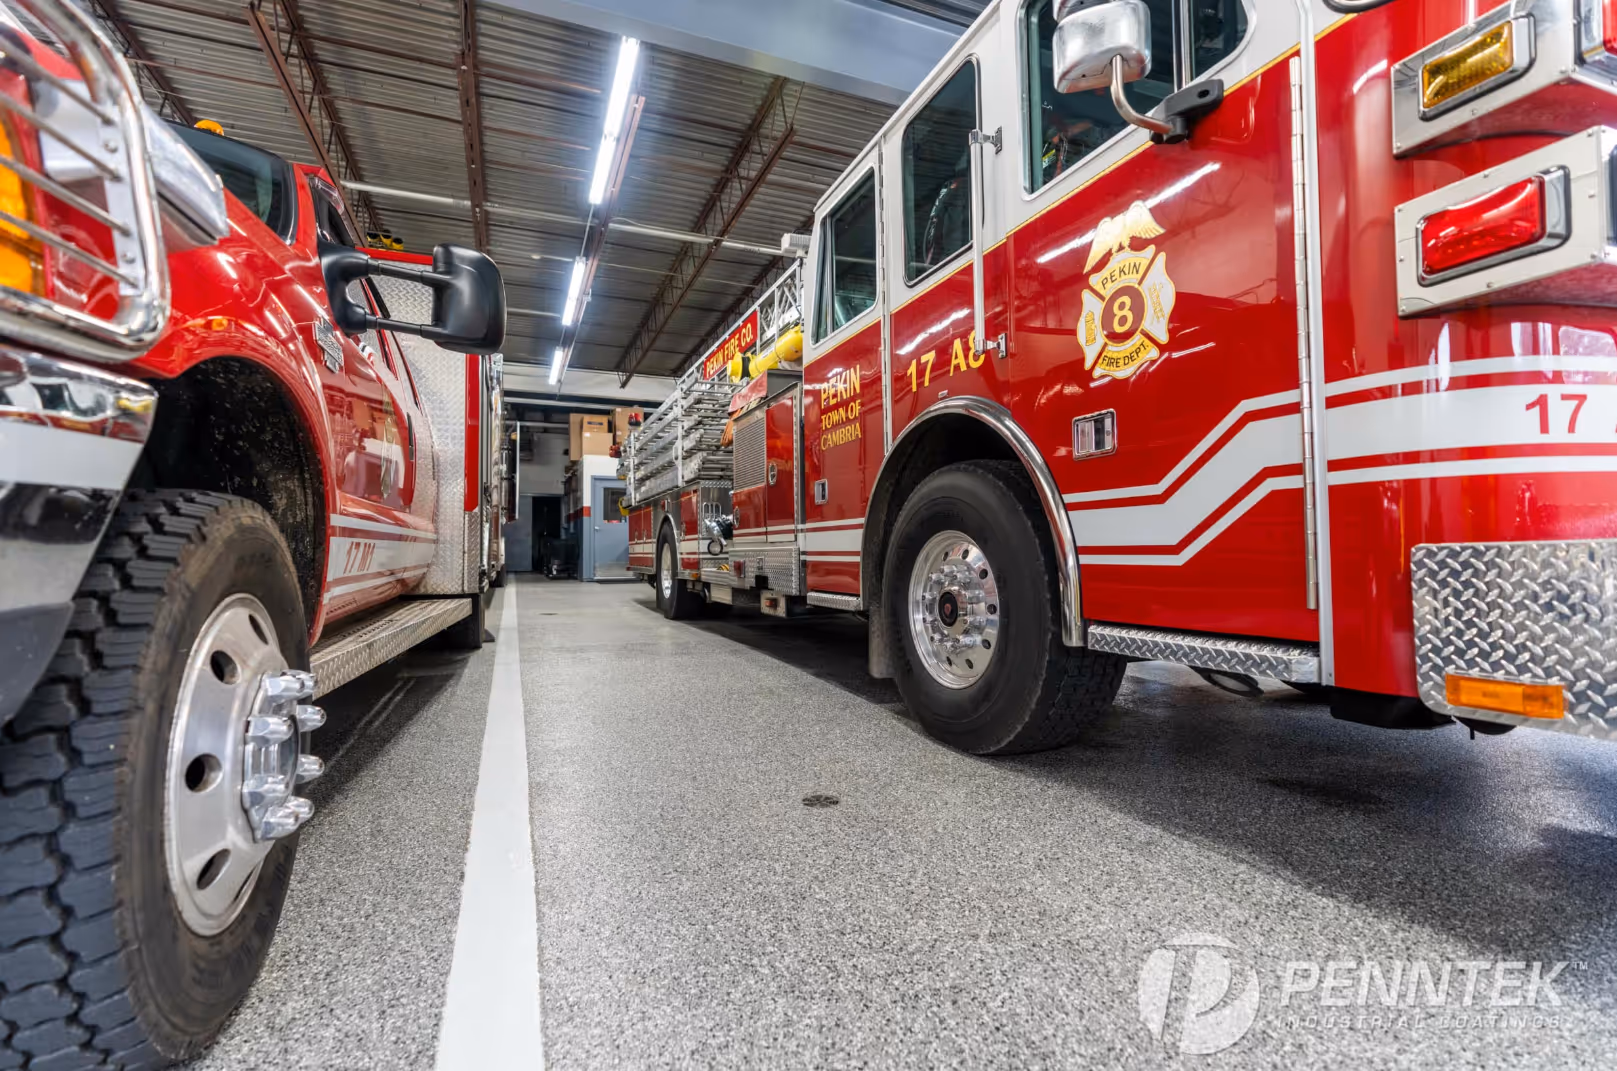
The final coating phase applies Penntek's proprietary polyurea topcoat, creating the durable, easy-to-clean, beautiful surface that will protect your garage floor for decades.
Topcoat Mixing and Preparation (15-20 minutes): Like the base coat, the topcoat is a two-component system requiring precise mixing. The crew carefully measures and mixes materials, adjusting application equipment for the topcoat's different viscosity and flow characteristics.
First Topcoat Application (45-60 minutes): The crew applies the first topcoat layer using specialized equipment that ensures even coverage and appropriate thickness. This coat encapsulates the decorative flakes while building the protective layer that will handle traffic, impacts, chemicals, and UV exposure.
Penntek's topcoat formulation includes several proprietary technologies:
Application Technique: Proper topcoat application requires skill and experience. Too thin, and the coating won't provide adequate protection. Too thick, and you waste material without performance improvement while potentially creating application issues. Our certified installers apply consistent thickness across the entire floor, feathering edges smoothly into walls and avoiding application marks.
Final Details and Edge Work (20-30 minutes): After the main floor application, the crew carefully addresses edges, corners, and any areas around permanent fixtures. These detail areas receive the same attention as the main floor—edge failure often indicates overall installation quality issues.
With the topcoat applied, the crew conducts a comprehensive quality inspection while the coating cures.
Visual Inspection (15 minutes): The installers carefully inspect the entire floor, looking for:
Touch-Up Application (10-15 minutes): Any identified issues receive immediate correction while the topcoat remains workable. This might include additional topcoat in thin areas, smoothing of application marks, or edge refinement.
Cure Monitoring: The crew monitors initial cure progress, ensuring the coating sets properly without issues. Problems during this phase are extremely rare with Penntek formulations and proper application, but monitoring provides quality assurance.
As your floor cures, the crew completes cleanup and prepares for your final walkthrough.
Equipment Cleaning (30 minutes): All application equipment gets thoroughly cleaned. Polyurea's rapid cure chemistry means equipment must be cleaned immediately after use—delayed cleaning results in hardened coating that ruins expensive equipment.
Site Cleanup (20-30 minutes): The crew removes all materials, packaging, and waste from your property. We leave nothing behind except your beautiful new garage floor. The surrounding driveway and walkways get cleaned of any tracking or overspray (though our contained application process minimizes this).
Safety Setup (10 minutes): We establish temporary barriers or caution tape preventing anyone from walking on the curing floor. While topcoat surfaces are dry to the touch within hours, the coating needs time to achieve full hardness before foot or vehicle traffic.
The final phase of installation day brings you and the crew together for a comprehensive walkthrough of your completed garage floor.
Floor Inspection (10-15 minutes): We walk through the garage together, allowing you to inspect the completed installation. This is your opportunity to ask questions, point out any concerns, and verify that the floor meets your expectations.
Care and Maintenance Instructions (10-15 minutes): The crew provides detailed guidance on:
Documentation and Warranty Registration (5-10 minutes): We provide all documentation including warranty information, maintenance guidelines, and contractor details. We explain Penntek's limited lifetime warranty, how to register it, and the warranty transfer process for future home sales.
Final Questions: This is your opportunity to ask any remaining questions about your new floor, maintenance, or the coating system. We want you completely comfortable with your investment and confident in your floor's long-term performance.
Your garage floor installation is complete, but the coating continues curing for several days. Understanding this cure process helps you protect your investment during this critical period.
Light Foot Traffic (4-6 Hours): The topcoat surface dries to the touch within 2-3 hours and can handle light foot traffic after 4-6 hours. "Light" means walking carefully, not heavy traffic or dropping tools and equipment. If you need to retrieve something from the garage during the first evening, you can walk carefully without damaging the coating.
No Vehicle Traffic (24-48 Hours): While the surface feels dry, the coating hasn't achieved full hardness. Driving vehicles onto the floor before 24 hours can leave tire marks or cause surface indentations. We recommend waiting 48 hours if possible, especially for heavier vehicles or in cooler weather that slows curing.
Temperature and Humidity Effects: Pacific Northwest weather affects cure rates. Warmer temperatures and lower humidity accelerate curing. Cooler, damp conditions slow it. This is why we may recommend longer wait times during winter installations or after particularly wet weather.
Ventilation: Keep your garage door open or ventilate the garage during the first 24 hours. While Penntek's low-VOC formula produces minimal odor, maintaining air circulation accelerates curing and removes any residual smell.
During the first week, your coating continues developing its final properties.
Gradually Increasing Use: You can return vehicles to the garage after 24-48 hours and resume normal garage use. However, the coating continues gaining hardness and chemical resistance for 7-10 days. During this first week:
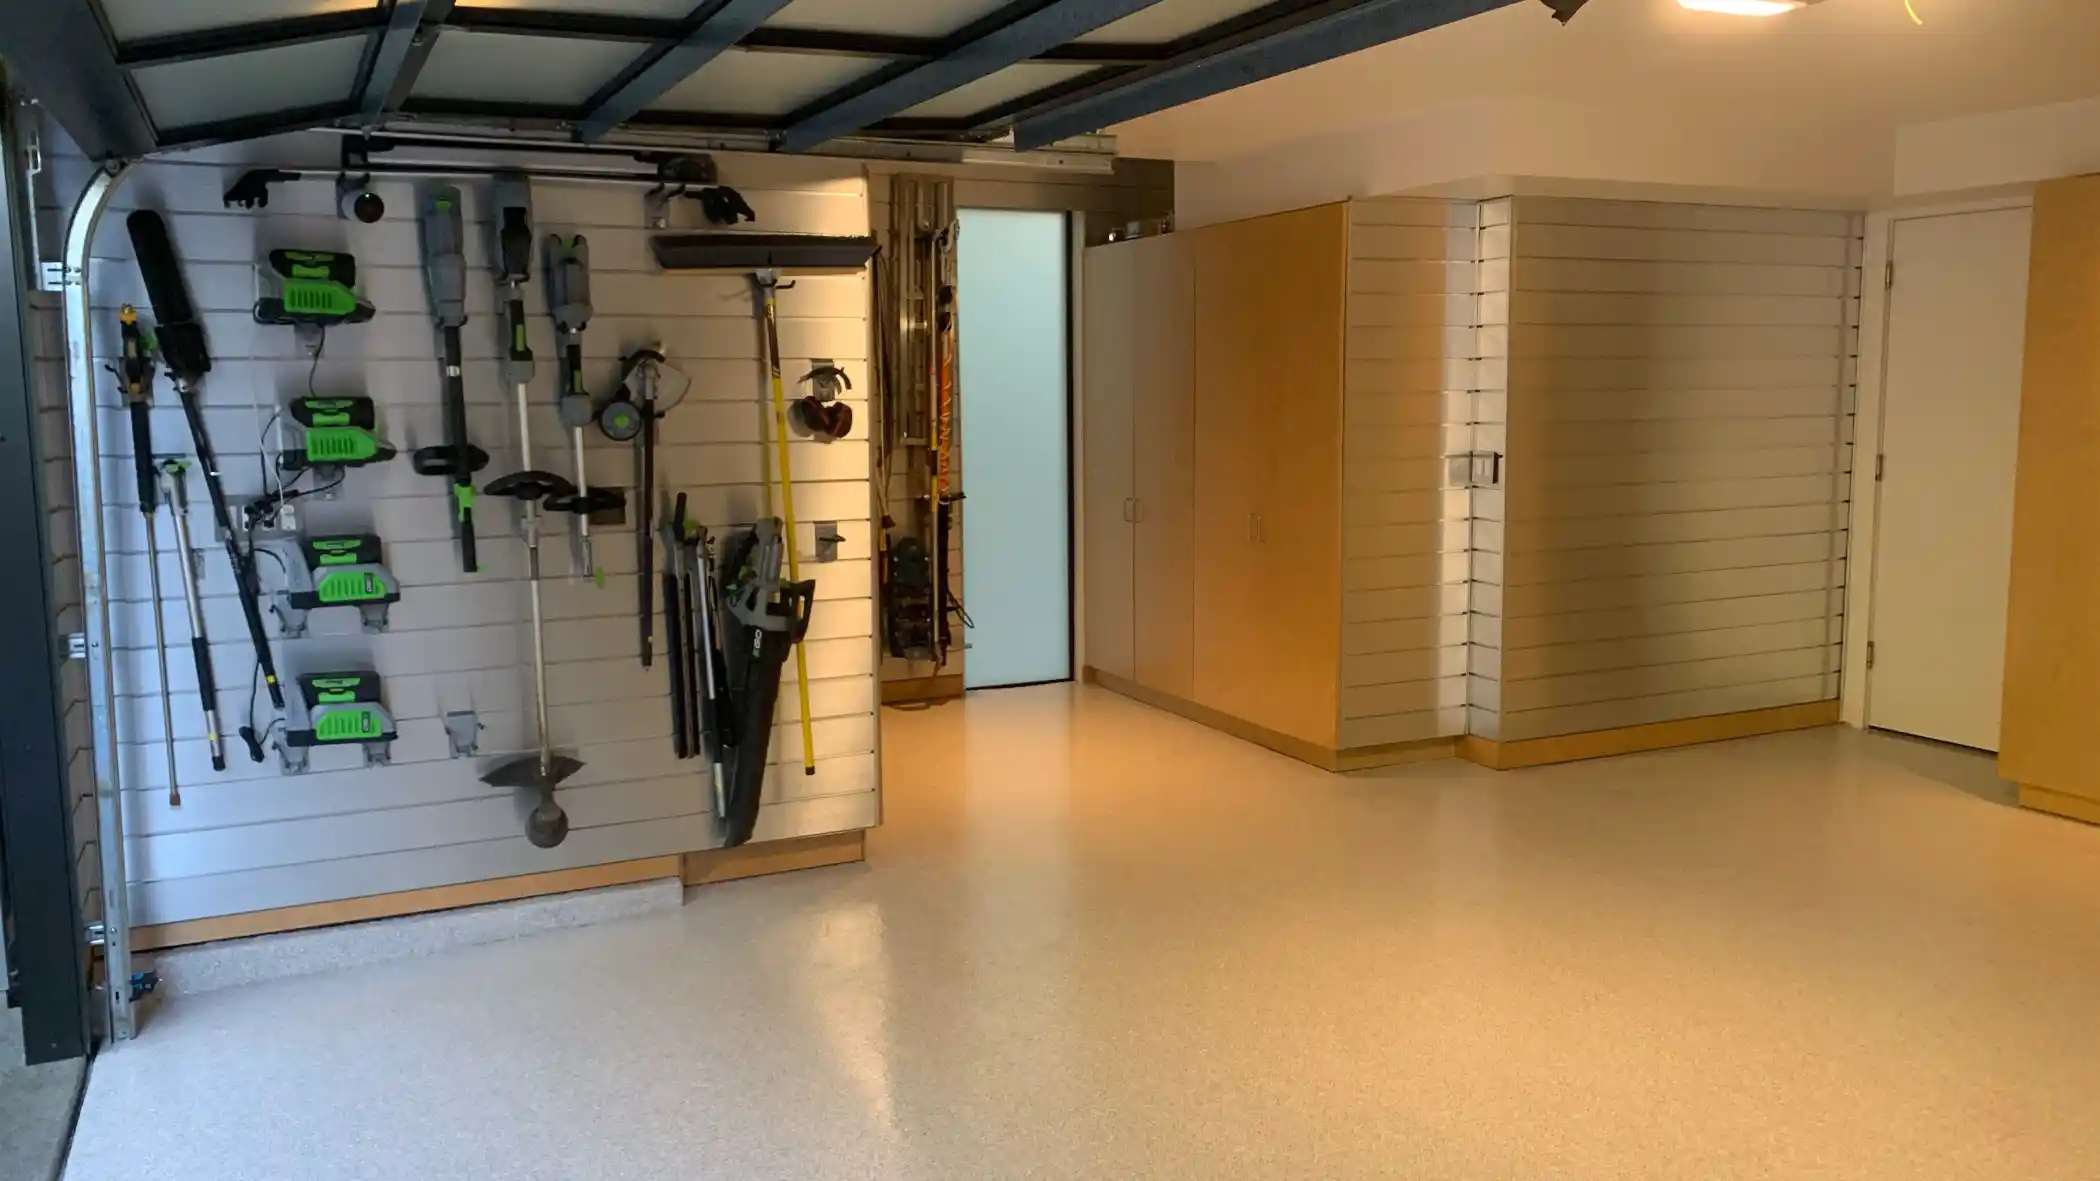
When Full Performance Develops: After 7-10 days, your Penntek floor has reached full cure and performance. It can now handle everything you'll throw at it—dropped tools, hot tires, chemical spills, and intensive use—without concern.
First Cleaning: We recommend waiting until day 7-10 for your first thorough cleaning. Before then, sweep or dust mop as needed, but avoid wet mopping or chemical cleaners. After full cure, you can clean as needed using water and mild soap or Penntek-approved cleaning products.
Understanding why our installation takes just one day while epoxy systems require 5-7 days helps explain the value of Penntek polyurea systems:
Day 1 (Epoxy): Surface preparation, crack repair, and first epoxy coat application. Garage unusable overnight.
Day 2 (Epoxy): Waiting for base coat cure. Garage remains unusable.
Day 3 (Epoxy): Flake broadcast and seal coat application. Garage still unusable.
Day 4-5 (Epoxy): Additional cure time before topcoat application.
Day 6 (Epoxy): Topcoat application. Garage unusable.
Day 7 (Epoxy): Final cure before vehicles can return.
This multi-day process means homeowners must keep vehicles elsewhere for an entire week, arrange alternative storage for garage contents, and deal with extended disruption. Compare this to Penntek's same-day installation where your garage returns to normal use within 24-48 hours.
The rapid cure chemistry that enables same-day installation doesn't compromise performance—it enhances it. Polyurea's superior flexibility, chemical resistance, and durability outperform epoxy while requiring less garage downtime.
Q: What if it rains on installation day?A: Light rain doesn't affect indoor garage installations. Heavy rain that creates humidity or temperature issues might require rescheduling. We monitor weather closely and communicate proactively if conditions necessitate changes.
Q: Can I stay home and watch the installation?A: Absolutely! Many homeowners enjoy watching the transformation. Just be aware of the noise during grinding phases and maintain a safe distance from work areas.
Q: What if you discover unexpected concrete problems during installation?A: Our initial consultation identifies most issues, but occasionally we uncover hidden problems during grinding. We'll stop work, explain the issue, present options and costs, and proceed only with your approval.
Q: How bad is the noise during installation?A: Grinding equipment generates noise comparable to a lawn mower or loud vacuum—noticeable but not extreme. The noisiest phase lasts 2-3 hours. Most neighbors and family members accommodate this short-term noise easily.
Q: Can I use the garage door or walk through during installation?A: Not during active work phases. Crew and equipment occupy the garage from arrival until completion. After the final walkthrough, you can enter the garage for light foot traffic after 4-6 hours, but avoid the floor until we confirm it's safe.
Q: What happens if I need to cancel or reschedule?A: Life happens—we understand. Contact us as soon as possible if you need to reschedule. Early notification helps us adjust schedules and potentially fill your slot with another homeowner.
The detailed timeline we follow isn't arbitrary—every phase exists for specific performance reasons. Rushing preparation leads to coating failures. Skipping quality checks creates problems that manifest years later. Applying coatings before proper cure causes adhesion issues.
When we complete hundreds of installations throughout Bellevue, Kirkland, Sammamish, and Redmond, each following this systematic timeline, we achieve consistent, reliable results. Homeowners get floors that maintain their beauty and performance for 30-40 years rather than failing within 3-5 years like budget installations.
This timeline also explains why professional Penntek installation costs more than DIY epoxy kits or budget contractor services. The equipment, expertise, and systematic process required to complete each phase properly represents significant investment. Homeowners who choose based purely on lowest price often discover within a few years that cheap garage floors become expensive garage floors once replacement becomes necessary.
Now that you understand exactly what happens during your garage floor coating installation, you can confidently move forward with scheduling. The process is systematic, the timeline is predictable, and the results are stunning.
Whether you're in Bellevue, Sammamish, Redmond, Kirkland, Bothell, Woodinville, Issaquah, or anywhere across the Seattle Eastside, Cascade Concrete Coatings brings certified Penntek installation expertise, systematic processes, and a proven track record of transforming garage floors in a single day.
Contact us today to schedule your complimentary consultation. We'll assess your garage, answer your questions, provide a detailed timeline customized to your specific project, and help you select colors that transform your garage into a space you'll love for decades.
Your garage transformation awaits—and now you know exactly what to expect every hour along the way.