You've researched garage floor coatings. You understand that Penntek's pure polyurea system offers superior durability, UV stability, and a lifetime warranty. You've seen the beautiful finished floors in countless photos. But now comes the practical question that every homeowner asks: What actually happens on installation day?
Understanding the Penntek installation process helps you appreciate why these floors last 30-40 years while typical epoxy fails in 3-5 years. The difference isn't just in the chemistry—it's in the meticulous, systematic approach that transforms your concrete from foundation to showpiece.
Let's walk through exactly what to expect when you choose professional Penntek installation, from initial consultation to the moment you pull your car back into a transformed garage.
The installation process actually begins well before any equipment arrives at your home. This pre-installation phase is where certified dealers demonstrate their expertise and commitment to quality.
Your journey starts with a comprehensive on-site evaluation. Unlike companies that provide quotes over the phone or based on square footage alone, Penntek Certified Dealers understand that not all concrete is the same. Each region uses different concrete mixtures, building codes vary by decade, and your home's specific land and ground conditions create unique characteristics.
During this consultation, experienced technicians:
Analyze Concrete Composition: Testing hardness levels, surface texture, and overall condition to determine the appropriate system for your specific substrate
Assess Moisture Levels: Using specialized equipment to measure moisture content and identify any underlying issues that could compromise coating adhesion
Identify Damage and Imperfections: Cataloging every crack, pit, spall, and surface irregularity that requires attention during preparation
Evaluate Environmental Factors: Considering garage usage patterns, sun exposure, drainage requirements, and other factors that influence system selection
This scientific approach ensures the coating system is perfectly matched to your concrete's unique characteristics—a critical factor in achieving decades of performance.
Once your concrete has been assessed, the creative part begins. Penntek offers an extensive array of colors, flake combinations, and finish options that allow you to create a truly custom floor.
You'll work with design professionals to:
The key advantage? These aren't generic epoxy kits with limited options. Penntek's professional system offers the customization typically reserved for high-end commercial installations, adapted for residential perfection.
Professional installation requires preparation beyond just clearing your garage:
Removing Contents: Everything must come out—vehicles, storage, workbenches, and any items against walls. Certified dealers often provide guidance on efficient garage emptying strategies.
Weather Verification: Temperature and humidity must be within optimal ranges. Penntek dealers monitor conditions carefully and reschedule if necessary rather than compromising installation quality.
Final Planning: Detailed discussion of timeline, any specific concerns, and logistics for the installation day.
This thorough pre-work prevents the rushed, compromised installations that plague cut-rate contractors.
Now comes the transformation. Understanding what happens—and why—helps you appreciate the precision and expertise that separates professional installations from amateur attempts.
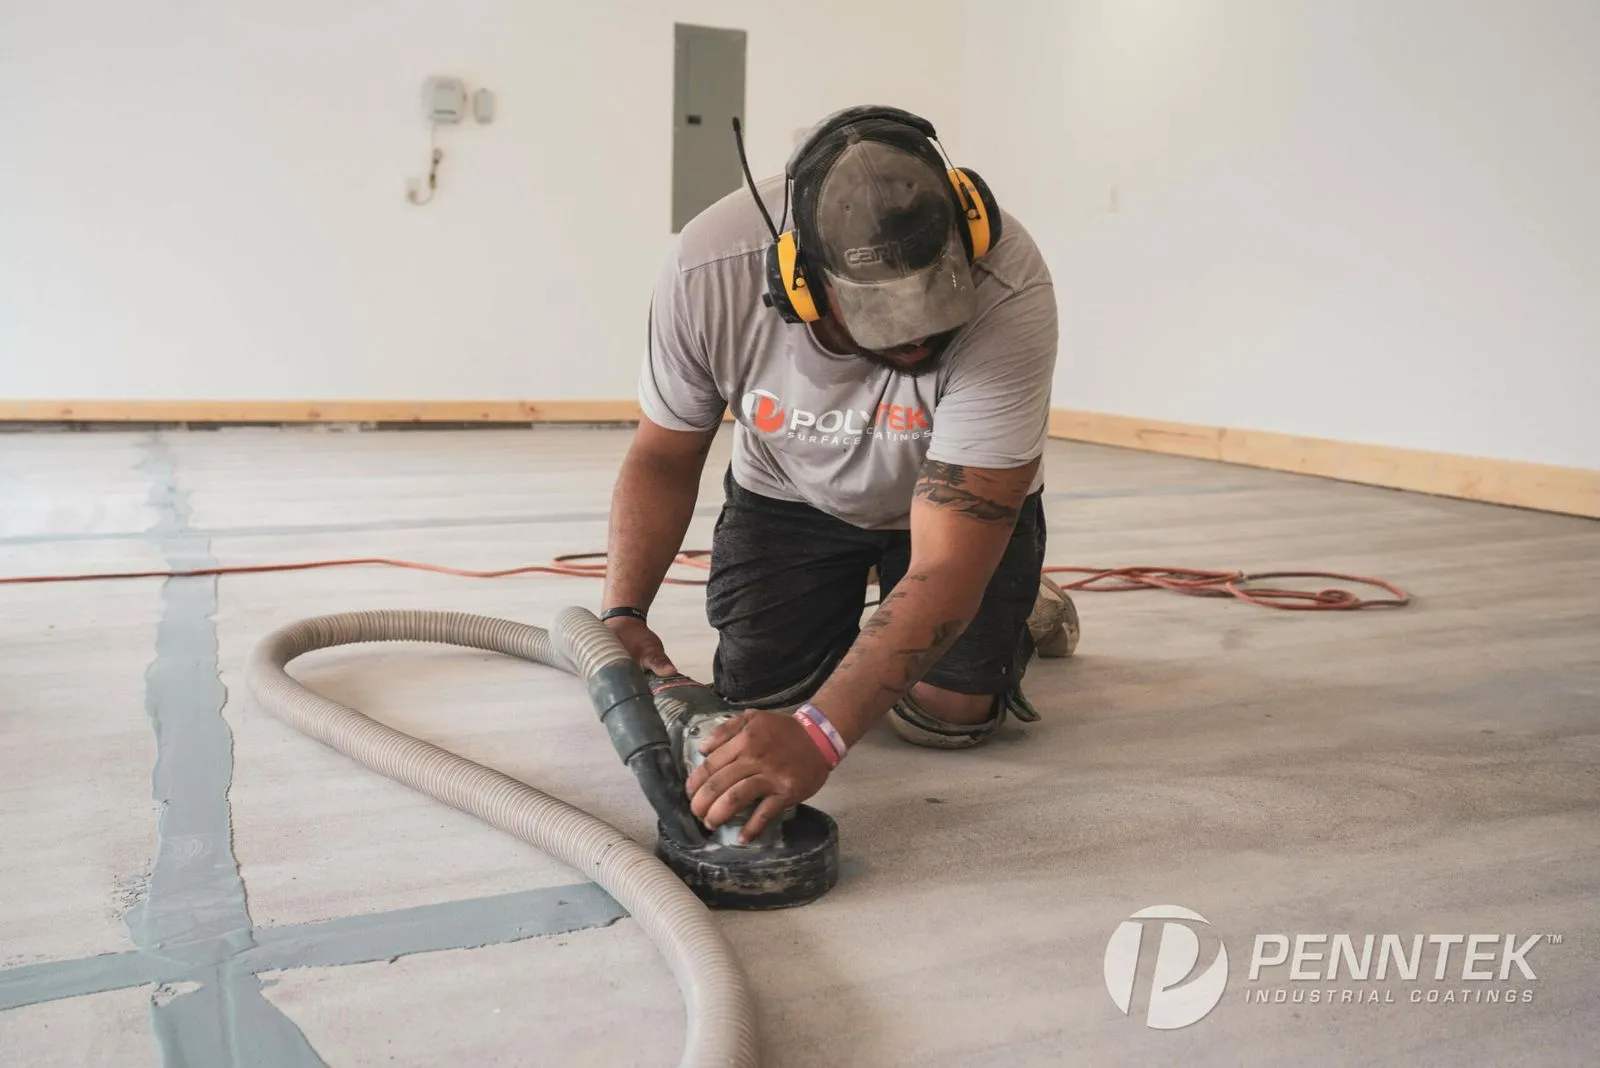
The installation begins with the most critical step: substrate preparation. This isn't light surface cleaning—it's aggressive mechanical profiling that creates the foundation for permanent coating adhesion.
Professional Equipment Makes the Difference:
Penntek Certified Dealers use commercial-grade floor grinders weighing over 600 pounds. These machines employ high-quality diamond tooling under extreme pressure to:
The grinding process removes approximately 1/16 to 1/8 inch of surface concrete, revealing clean, receptive substrate. The concrete hardness identified during assessment determines exactly how aggressively to grind—too little leaves contaminants, too much weakens the surface.
Why This Matters: Epoxy companies often skip or rush this step because proper grinding is time-consuming, expensive, and requires significant equipment investment. But without pristine substrate preparation, even the best coating chemistry cannot perform as designed. This is why DIY installations and cheap epoxy jobs fail—the foundation was never properly established.
With the surface properly profiled, every imperfection must be addressed. This methodical process separates companies that care about longevity from those chasing quick installations.
Using Penntek Mender HD:
This rapid-cure polyurea repair system represents a technological leap beyond traditional concrete patching:
Certified technicians:
Any missed blemish or underlying weak spot will lead to a broken seal, allowing moisture, water, and movement that ruins both floor and coating. Companies with highly trained experts working methodical systems ensure they deliver proper crack fixing on every job.
After grinding and repairs, the substrate undergoes meticulous final preparation:
Industrial Vacuuming: Professional equipment removes every particle of dust and debris. Even microscopic contamination interferes with coating adhesion, so multiple vacuum passes ensure pristine conditions.
Chemical Preparation: The surface receives chemical treatment optimized for the Penntek system, ensuring maximum bonding potential.
Quality Inspection: Experienced installers verify every square foot meets specifications before coating application begins.
If the company doesn't adequately clean after grinding—if they're hurrying, or if their standards aren't high enough—the substrate won't properly hold what's applied. Penntek's rigorous certification and training system ensures installers follow proven best practices every time.
Now the transformation becomes visible. The base coat application showcases the chemical engineering that makes Penntek floors exceptional.
Penntek's Pure Polyurea Technology:
Unlike typical epoxy that creates only a mechanical bond (gripping surface texture), Penntek's pure polyurea basecoat enhanced with silane adhesion promoters creates chemical bonds at the molecular level with concrete surfaces. This bond is so strong that concrete would break before the coating would separate.
The base coat:
Professional application requires precise technique:
The experience, professionalism, patience, and rigorous pursuit of high standards during this phase dramatically impact coating quality and longevity.
Once the base coat reaches the right stage of cure, the aesthetic magic happens:
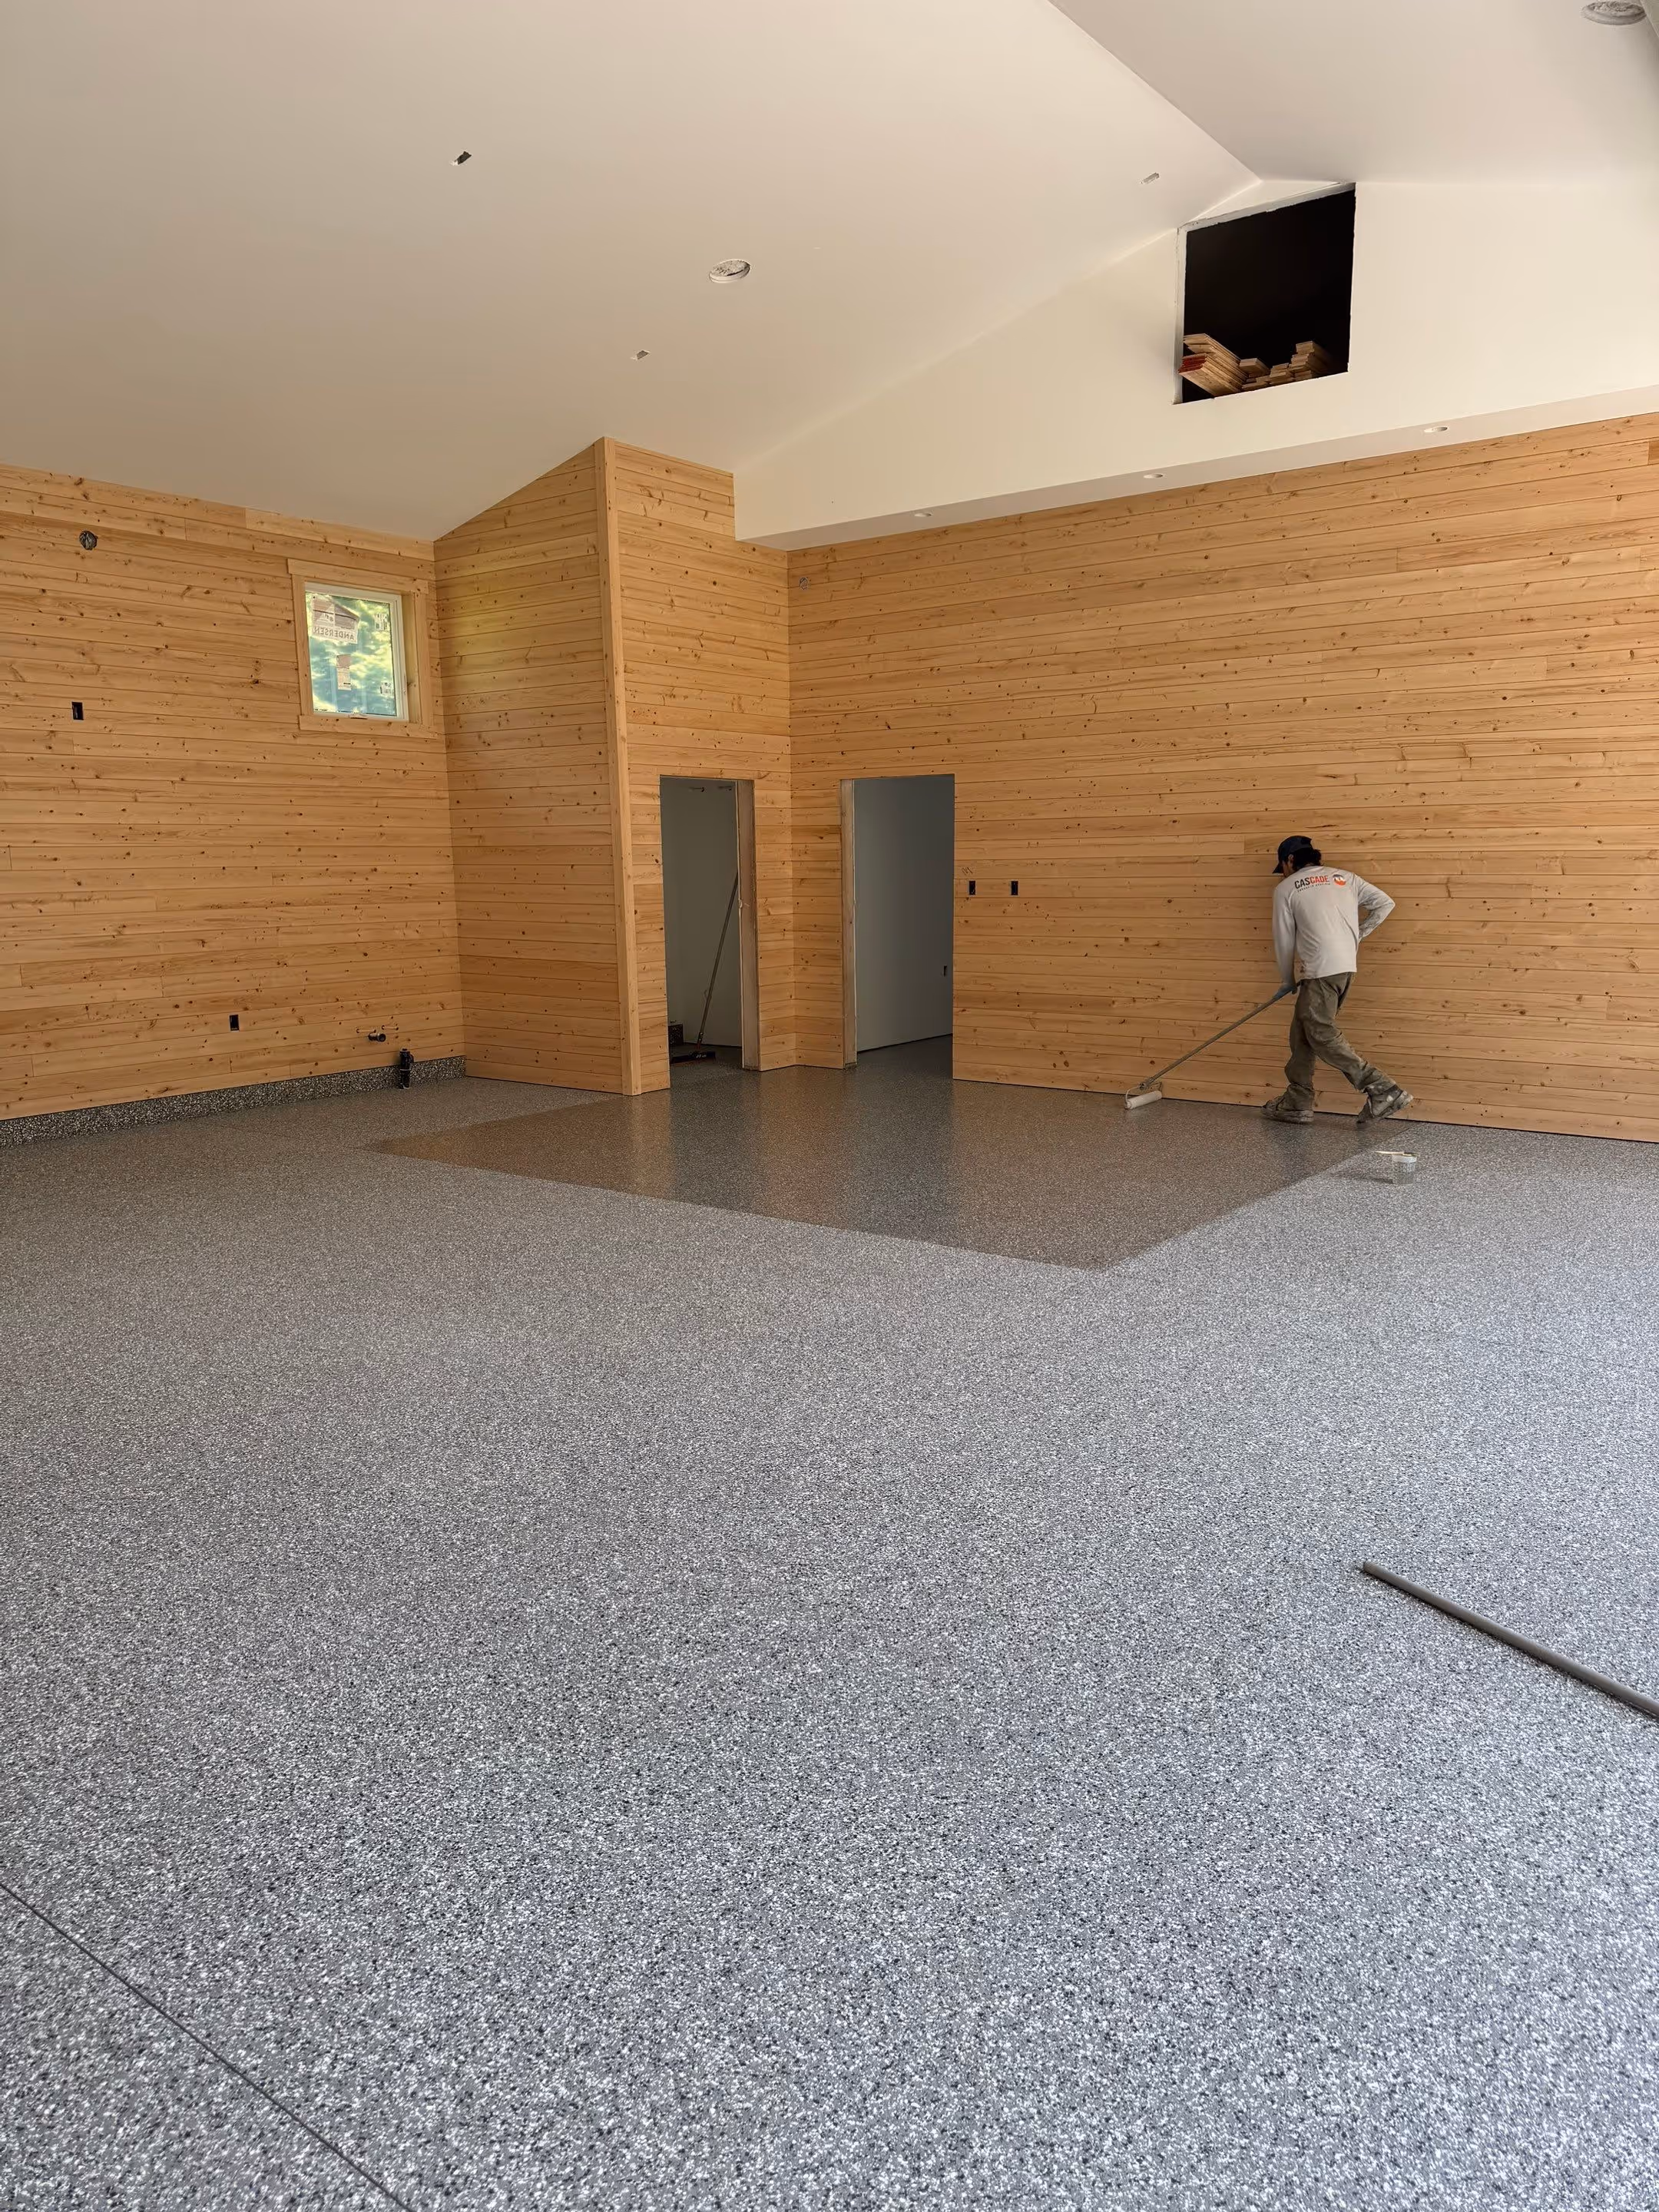
UV-Stable Flake Application:
Decorative polymer flakes in your chosen color blend are broadcast across the wet base coat. These aren't ordinary paint chips—they're engineered materials that are 100% UV stable, meaning they'll never fade or discolor over decades of sun exposure.
The broadcasting technique requires skill:
Why This Matters: The flakes aren't just decorative—they add slip resistance, hide minor substrate imperfections, and create the distinctive appearance that makes coated floors so visually appealing.
After appropriate cure time, loose flakes must be removed:
Certified installers systematically scrape the surface, collecting flakes that didn't embed in the base coat. This process:
This seemingly simple step requires judgment about how much pressure to apply, which areas need more attention, and when the surface is properly prepared for the final coating layer.
The final and perhaps most critical layer: Penntek's proprietary Polyaspartic topcoat that delivers the floor's ultimate performance characteristics.
The Non-Porous Protective Shield:
This topcoat creates a 100% non-porous finish that's antibacterial, antimicrobial, and engineered for maximum durability. This isn't hyperbole—it's measurable surface chemistry that fundamentally differs from porous epoxy systems.
Key features:
Application requires precision:
Moisture levels, temperature, coating type, and application speed all determine installation quality. When you have an install team that's properly trained, held to certification standards, working together with experience, and not rushed or compromised in any way—they can patiently install a high-quality coating that performs for decades.
After topcoat application, the floor needs appropriate cure time:
Fast But Complete Cure:
Before leaving, certified installers conduct final inspection:
Understanding the process reveals why Penntek floors outlast competitors by 500%:
Scientific System Selection: Matching coating chemistry to your specific concrete's characteristics rather than one-size-fits-all approaches
Uncompromising Preparation: Professional equipment, thorough crack repair, and pristine substrate preparation that most competitors skip
Superior Chemistry: Pure polyurea (99%+ solids) with chemical bonding versus epoxy's mechanical grip or "stretched" polyurea with fillers
Certified Expertise: Rigorous training at Penntek headquarters, including successful completion of courses led by AMPP-certified technical teams
Quality Control: Systematic processes, proven tactics, and culture of excellence that ensures consistency across every installation
Manufacturer-Backed Warranty: Limited lifetime warranty supported directly by the chemical manufacturer, not just the installer
Pre-Installation (1-2 weeks before):
Installation Day (typically 6-10 hours):
Post-Installation:
Compare this to epoxy installations that often take multiple days due to longer cure times—losing garage access for nearly a week versus Penntek's efficient one-day transformation.
You might wonder: does this level of detail and process rigor really make a difference?
Consider the alternative. Many coating companies:
The result? Floors that look acceptable initially but start showing blistering, delamination, yellowing, and difficulty cleaning in years 2-4. You'll find yourself spending money, time, and energy redoing your floor—even with a warranty, the hassle and lost value are significant.
The true cost equation: A floor that lasts 30-40 years versus one requiring replacement every 3-5 years. The investment in proper installation delivers the lowest lifetime cost of ownership.
When evaluating coating companies, questions about their process reveal their competence:
Professional contractors provide detailed, confident answers because they follow proven processes. Vague or dismissive responses indicate problems.
To ensure a smooth installation day:
Week Before:
Day Before:
Installation Day:
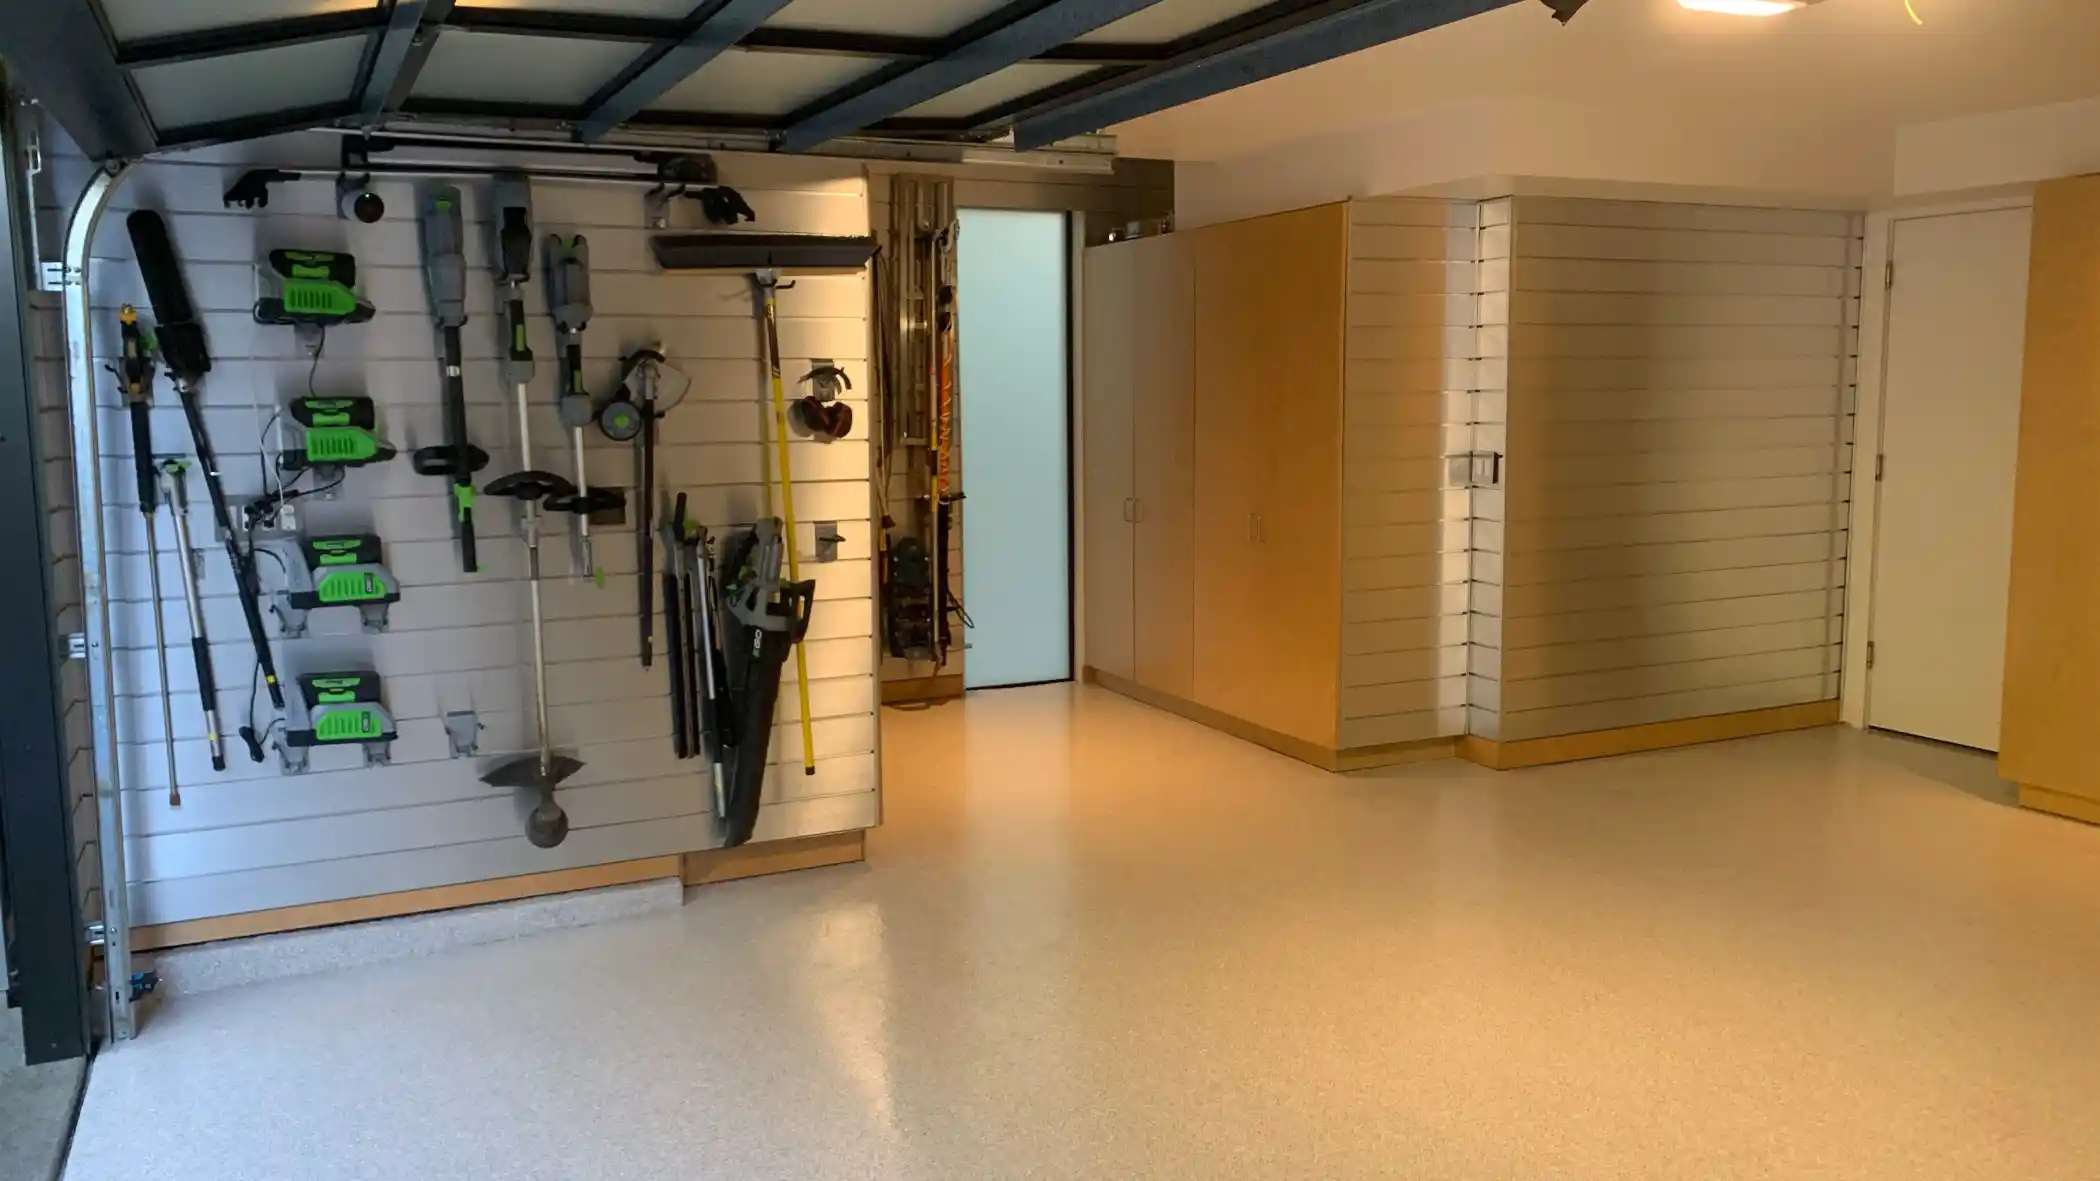
Once your floor is complete, the real benefits begin:
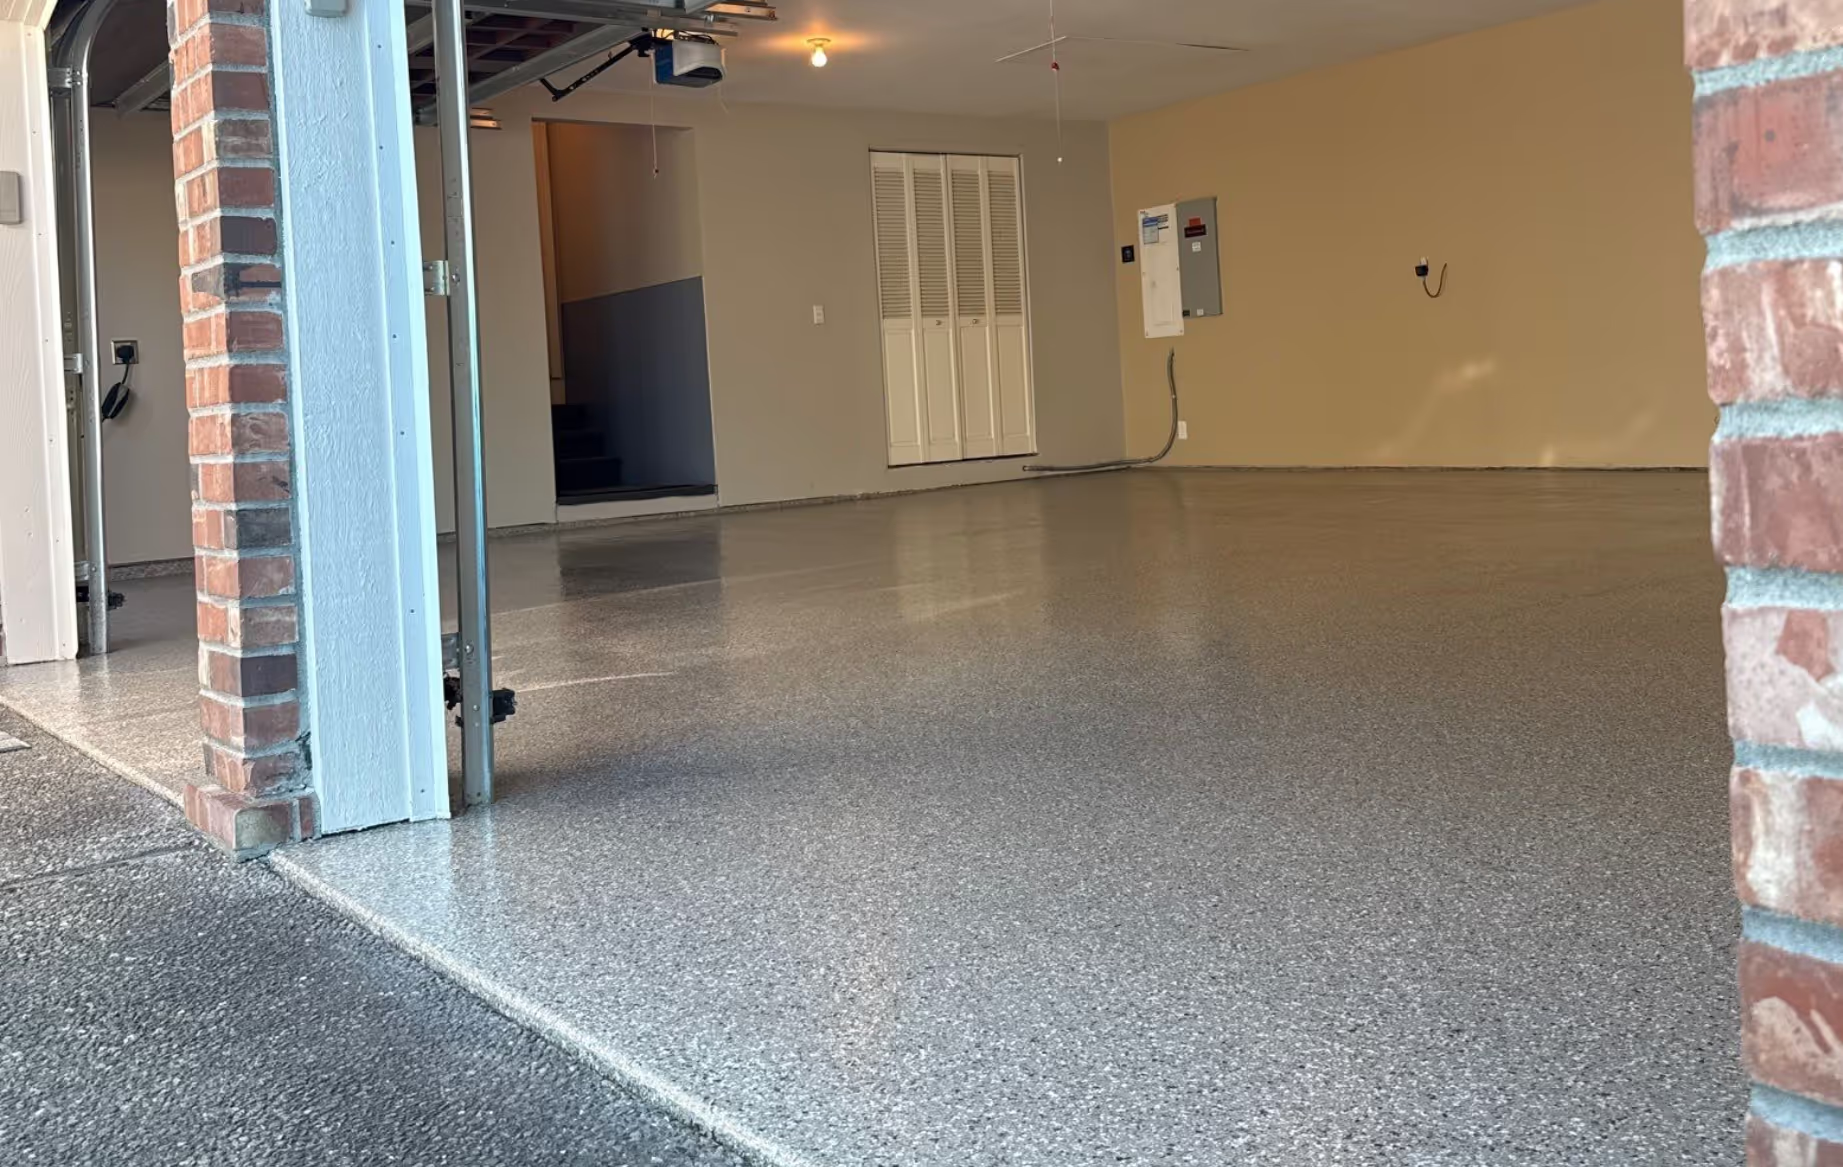
Immediate Impact: The visual transformation is dramatic—dull, stained concrete becomes a showroom-quality surface
Easy Maintenance: Simple cleaning routines keep your floor looking pristine with minimal effort
Long-Term Performance: Year after year, your floor maintains its appearance and functionality while epoxy competitors deteriorate
Peace of Mind: Manufacturer-backed lifetime warranty provides protection and confidence in your investment
Understanding the Penntek installation process reveals why these floors deliver exceptional value. The combination of scientific analysis, professional preparation, superior chemistry, and certified expertise creates floors that perform for decades rather than years.
If you're ready to experience the transformation, schedule your free consultation with a Penntek Certified Dealer. You'll receive:
Your garage deserves more than a cheap epoxy job that fails in a few years. Choose a process and product engineered for a lifetime of beautiful, worry-free performance.
Key Takeaways:
Ready to see what professional installation looks like? Explore design options and discover how Penntek's refined process transforms ordinary concrete into extraordinary floors, or contact us today to begin your garage transformation.
Don't settle for rushed installations and inferior products. Experience the Penntek difference—where process perfection meets chemical excellence.