Every week, homeowners throughout Bothell and Woodinville contact us with the same heartbreaking story: their garage floor coating is peeling, bubbling, or has completely failed within just 1-3 years of installation. They invested thousands of dollars—sometimes with contractors who seemed reputable—only to watch their floor deteriorate far sooner than promised. The frustration in their voices is palpable. They emptied their garage, disrupted their lives, spent their money, and now face doing it all over again.
The worst part? These failures were completely preventable. The coating didn't fail because of bad luck or defective products. It failed because someone—whether a budget contractor or the homeowner attempting DIY—made one or more of five critical installation mistakes that virtually guarantee premature coating failure. These aren't subtle technical errors that only experts would notice. They're fundamental preparation and application failures that create obvious problems within months or a few years.
As the certified Penntek dealer serving the Seattle Eastside, we've assessed, removed, and corrected hundreds of failed garage floor coatings throughout Kirkland, Redmond, Sammamish, and surrounding communities. While every failed installation has its unique story, the root causes cluster around five recurring mistakes. Understanding these failures helps homeowners avoid them—whether by choosing qualified contractors or by understanding why professional Penntek installation provides dramatically better long-term results.
If we had to identify the single biggest reason garage floor coatings fail prematurely, inadequate surface preparation would win overwhelmingly. Proper preparation determines coating performance more than any other factor—more than coating quality, more than application technique, more than environmental conditions. Yet it's the phase where contractors and DIY installers most commonly cut corners because thorough preparation requires expensive equipment, significant time, and meticulous attention to detail.
Professional surface preparation for garage floor coatings involves multiple steps, each essential to long-term coating adhesion:
Diamond Grinding to ICRI Profile 2-3: The concrete surface must be mechanically abraded using diamond grinding equipment that creates the proper surface profile. ICRI (International Concrete Repair Institute) profile 2-3 resembles 60-80 grit sandpaper texture when you run your hand over it. This texture dramatically increases surface area and creates the mechanical interlock necessary for coating adhesion.
Creating this profile requires commercial-grade grinders weighing 600+ pounds with multiple diamond cup wheels operating under extreme downward pressure. These machines systematically work across the entire floor, removing the top layer of concrete along with all surface contamination, sealers, curing compounds, and weak concrete. The grinding process also opens concrete pores, allowing chemical penetration for the superior adhesion Penntek polyurea achieves.
Complete Contaminant Removal: Garage floors accumulate oil, grease, tire rubber, dirt, de-icing salts, and other contamination over years of use. This contamination must be completely removed—not just surface-cleaned but ground away to reach clean concrete beneath. Even contamination invisible to the naked eye prevents proper coating adhesion.
Crack and Damage Repair: Every crack, chip, pit, and damaged area must be identified and properly repaired before coating application. Inadequate crack repair allows moisture infiltration and substrate movement that telegraphs through coatings and creates failure points.
Thorough Cleaning: After grinding, the surface must be meticulously cleaned using industrial HEPA vacuums followed by tack wiping to remove all dust and residue. Any remaining dust prevents the coating from contacting concrete directly, compromising adhesion.
We regularly encounter these specific preparation failures when assessing failed coatings:
Light Surface Grinding Only: Budget contractors and DIY installers often use lightweight rental grinders (50-80 pounds) that can't create proper surface profiles in the hard concrete common throughout Western Washington. They make one or two passes over the floor, removing surface dirt but not creating the necessary mechanical profile. The floor looks cleaner and slightly textured, but proper preparation requires multiple aggressive passes with commercial equipment.
The result appears acceptable initially. The coating adheres to this lightly-prepared surface well enough to look good for 6-18 months. However, without proper mechanical profile and chemical penetration, the bond gradually weakens. Traffic, thermal cycling, and minor substrate movement stress the weak bond until sections begin peeling—typically starting at edges and high-stress areas like wheel paths.
Incomplete Grinding Coverage: Some installers grind the main floor area adequately but shortcut edge work, corners, and areas around posts or obstacles. These unground or lightly-ground areas provide insufficient adhesion, creating failure points where peeling begins. Once peeling starts at edges, it progressively extends inward as moisture infiltrates beneath the coating.
We've seen installations where 80% of the floor was well-prepared but 20% of the perimeter was inadequately ground. Within two years, the entire coating has delaminated because the failure that began at poorly-prepared edges propagated across the entire floor.
Insufficient Contamination Removal: Oil and grease contamination penetrate into concrete, and light grinding doesn't remove this deep contamination. Coatings applied over contaminated concrete may adhere initially, but contamination gradually migrates to the coating interface and interferes with adhesion. This creates the frustrating situation where the floor looks fine for the first year but begins bubbling and peeling in year 2-3 as contamination reaches the surface.
Skipped Crack Repair: Contractors rushing through installations sometimes apply coating directly over cracks without proper repair. The coating bridges the crack initially, but concrete movement and moisture infiltration through the crack create stress points. The coating delaminates along crack lines, often peeling away in large sections on either side of the crack.
Inadequate Cleaning: After grinding, some installers vacuum once and proceed immediately to coating application without thorough cleaning. Grinding dust left on the surface prevents direct coating-to-concrete contact. This failure mode is particularly insidious because the coating may look perfect initially—the problem isn't visible until the coating begins lifting months later.
Proper preparation takes 4-6 hours for a typical two-car garage and requires $50,000-100,000+ in commercial equipment. Budget contractors can complete "preparation" in 1-2 hours using lightweight rental equipment costing $100/day. This time and equipment cost difference explains why some contractors can offer dramatically lower prices—they're not doing the same preparation work.
Homeowners attracted to low prices don't realize they're paying for inadequate preparation that virtually guarantees premature failure. When the coating fails in 2-3 years and requires complete removal and re-installation, the "cheap" option costs far more than professional preparation would have cost initially.
Professional Penntek preparation costs more upfront, but that cost reflects the commercial equipment, certified installer expertise, and time required to prepare substrates correctly. This investment in preparation is what enables 30-40 year coating life rather than 2-5 year failure cycles.
Moisture-related coating failure ranks second only to preparation failures as a cause of premature coating delamination. Concrete is porous—moisture moves through it continuously via vapor diffusion and capillary action. When moisture vapor pressure beneath a coating exceeds the coating's ability to allow moisture passage or resist pressure, failure occurs through several mechanisms: osmotic blistering, adhesion failure, alkaline attack, or hazing.
Ground moisture and water tables transmit moisture upward through concrete slabs. This moisture doesn't move as liquid water—it migrates as water vapor driven by humidity differentials and vapor pressure. Moisture vapor emission rate (MVER) quantifies this transmission, measured in pounds per 1,000 square feet per 24 hours.
Concrete with MVER below 3 lbs/1000 sf/24 hrs generally accepts standard coating systems safely. MVER between 3-5 lbs requires moisture-tolerant systems or specialized primers. MVER above 5 lbs demands advanced moisture mitigation or extended drying periods before coating application. The challenge? You can't see moisture vapor transmission—concrete can look and feel completely dry while having MVER readings high enough to cause coating failure within months.
DIY Installations: DIY coating kits include minimal or no moisture testing guidance. Instructions typically advise checking whether concrete "looks dry" or conducting a plastic sheet test. The plastic sheet test involves taping plastic to the floor overnight and checking for condensation—it only detects severe surface moisture, completely missing the subsurface vapor transmission that causes most coating failures.
Homeowners proceed with installation during dry summer months when concrete appears driest, not realizing that concrete can have MVER of 5-7 lbs while appearing bone dry. The coating adheres initially, but rising moisture through fall and winter creates pressure that causes osmotic blistering and delamination.
Budget Contractors: Many budget contractors don't own moisture testing equipment or lack training in proper testing protocols. They assess moisture visually or with simple moisture meters that only read surface moisture. These shortcuts miss the subsurface moisture vapor transmission that professional calcium chloride testing or relative humidity probe testing would reveal.
We've assessed failed installations where contractors insisted the concrete was "dry" based on visual inspection, but our calcium chloride testing revealed MVER of 4-6 lbs—well above safe thresholds for the epoxy systems installed. The contractors meant well but lacked the equipment and expertise to properly assess moisture conditions.
Seasonal Timing Issues: Some installers conduct moisture testing during summer's driest conditions, get acceptable readings, and schedule installation for fall or winter when moisture levels have risen. By installation time, MVER may have increased beyond safe levels, but the contractor proceeds based on outdated test results.
The Seattle area's climate creates particularly challenging moisture conditions. Properties near Lake Washington experience elevated ambient humidity that affects concrete moisture transmission. Older homes built before modern vapor barrier standards often have concrete slabs poured directly on earth without polyethylene moisture barriers. These slabs experience significant moisture transmission from below regardless of surface conditions.
Bothell and Woodinville properties often have high water tables, hillside locations with groundwater movement, or poor drainage that elevates subsurface moisture. These conditions make moisture testing particularly critical—assumptions about "dry" concrete are frequently wrong in Pacific Northwest climates.
Moisture-related failures typically don't appear immediately. The coating may look perfect for 6-18 months before problems manifest:
Osmotic Blistering: Moisture accumulating beneath the coating creates pressure, lifting the coating away from concrete in bubble-like blisters. These blisters start small but progressively enlarge as more moisture accumulates. Eventually, blisters rupture or coalesce, causing coating delamination over large areas.
Edge Peeling: Moisture vapor naturally concentrates at floor edges and penetrations (floor drains, expansion joints). Coating failure often begins at these moisture concentration points, with peeling progressively extending inward.
Clouding or Hazing: Moisture infiltration into clear topcoats creates a cloudy or hazy appearance that ruins aesthetics even if adhesion remains intact. This is particularly common with epoxy systems in high-humidity environments.
Alkaline Attack: Moisture moving through concrete carries alkaline compounds that chemically attack certain coating types, particularly water-based epoxy. This chemical attack gradually degrades the coating-concrete interface, causing delamination.
Every Cascade Concrete Coatings installation includes thorough moisture assessment using calibrated testing equipment and industry-standard protocols. We conduct calcium chloride testing following ASTM F1869 methodology, and when initial results indicate concerns, we use in-situ relative humidity probes following ASTM F2170 for the most accurate assessment.
When testing reveals elevated moisture, we don't proceed with standard coating systems and hope for the best. We select appropriate solutions:
This systematic approach prevents moisture-related failures that plague installations where contractors skip testing or proceed despite elevated moisture readings.
Not all garage floor coatings are created equal. The chemistry underlying different coating types creates dramatic performance differences, and using the wrong product for an application virtually guarantees premature failure or disappointing performance. Yet budget contractors and DIY installers routinely select products based on cost or convenience rather than performance requirements.
Water-Based Epoxy (Most DIY Kits): These formulations use water as the carrier solvent, making them low-VOC, easy to apply, and inexpensive. However, water-based epoxy has significant performance limitations:
Mid-Grade Polyaspartic/Polyurea Blends: These products attempt to bridge the gap between epoxy and premium polyurea, but "stretched" formulations using fillers or improper blending often underperform:
Pure Penntek Polyurea (99% Solids): Professional-grade pure polyurea formulations represent the highest-performance option:
We regularly encounter installations where the coating itself caused premature failure:
DIY Epoxy in High-Moisture Environments: Water-based epoxy applied in garages with elevated moisture vapor transmission fails rapidly through osmotic blistering and adhesion failure. The homeowner followed kit instructions perfectly, but the product fundamentally couldn't handle the substrate conditions.
Budget Polyurea in Heavy-Use Applications: Mid-grade polyurea products marketed as "professional grade" often contain significant filler materials that compromise performance. In garages with heavy vehicle traffic, turning vehicles, or workshop use, these products fail through wear, hot tire pickup, or delamination far sooner than promised.
Epoxy Over Previously Sealed Concrete: Some concrete has old sealers or curing compounds that weren't completely removed. Water-based epoxy can't penetrate through residual sealer to reach concrete, creating a coating-to-sealer bond instead of coating-to-concrete. When the old sealer fails (which it will), the new coating fails simultaneously.
Wrong Topcoat Selection: Some installers use inappropriate topcoats—either too thin, too soft, or chemically incompatible with base coats. The floor may look good initially, but the topcoat wears through quickly or delaminates from the base coat, exposing decorative flakes and creating an ugly, damaged appearance.
Budget coating products cost less for specific reasons—they contain cheaper ingredients, use filler materials, or employ simplified chemistry that performs poorly compared to premium formulations. DIY epoxy kits from big-box stores might cost $200-400 for a two-car garage, while professional Penntek installation costs $6,000-10,000.
That price difference reflects:
When homeowners choose based primarily on lowest upfront cost, they unknowingly select products that cannot possibly deliver long-term performance. The "cheap" coating becomes expensive when it requires removal and replacement within 2-3 years.
Even with proper preparation and appropriate products, poor application technique causes failures. Coating application requires specific skills, proper equipment, and adherence to precise timing and environmental windows. Rushed installations, inexperienced applicators, or attempts to beat weather create application errors that manifest as performance problems.
Coating Thickness: Both too-thin and too-thick applications create problems. Too-thin coatings don't provide adequate protection and wear through quickly. Too-thick coatings can trap solvents or create stress that causes cracking. Proper thickness requires experience and calibrated application equipment.
Environmental Conditions: Temperature and humidity dramatically affect coating cure and performance. Applying coatings when concrete temperature is too low prevents proper cure. High humidity interferes with adhesion. Temperature differentials between coating and concrete cause application problems.
Professional installations monitor conditions carefully and delay application when conditions fall outside acceptable ranges. Budget contractors and DIY installers often proceed regardless of conditions because they've scheduled the job or purchased materials—environmental condition problems don't appear until weeks or months later when coatings begin failing.
Cure Time Between Coats: Multi-coat systems require specific cure times between applications. Applying subsequent coats before previous coats have cured sufficiently causes intercoat adhesion problems, solvent entrapment, or incomplete cure that leaves coatings soft and vulnerable to damage.
Epoxy systems require 24-72 hours between coats depending on temperature—yet budget contractors sometimes apply topcoats after just 8-12 hours to compress schedules. This creates weak intercoat bonds that fail under traffic or thermal stress.
Flake Broadcast Technique: Applying decorative flakes requires specific techniques to achieve full coverage without excessive thickness. Inadequate flake broadcast leaves bare base coat exposed that wears differently than flaked areas, creating ugly wear patterns. Excessive flake broadcast creates too-thick texture that's uncomfortable to walk on and difficult to clean.
Edge Detail Work: Proper edge work requires specific techniques and tools to achieve clean lines and complete coverage right to walls. Sloppy edge work creates ugly transitions, leaves uncoated concrete exposed at perimeters, or causes coating to pull away from walls as it cures.
Through hundreds of repair assessments, we've identified application errors that regularly cause problems:
Applying Coatings to Damp Concrete: Morning dew or fog common in the Seattle area creates surface moisture that interferes with adhesion even when substrate moisture is acceptable. Installers rushing to complete jobs apply coatings before concrete surface has dried, creating immediate adhesion problems.
Temperature-Related Cure Problems: Applying coatings when concrete or air temperature is too low prevents proper cure. The coating may appear dry but hasn't achieved chemical cure, leaving it soft and vulnerable to damage. We've seen installations where homeowners returned vehicles to garages too soon after cold-weather installations, creating permanent tire marks in incompletely-cured coatings.
Inconsistent Coating Thickness: Inexperienced applicators create thick and thin areas, visible as color variations or differential wear patterns. Thin areas wear through quickly while thick areas remain intact, creating ugly, blotchy appearance.
Poor Flake Distribution: Amateur flake broadcast creates clumpy, uneven coverage with bare spots and overly-thick areas. This looks unprofessional and creates differential wear as thin and thick areas age differently.
Trapped Contaminants: Dust, insects, or debris falling onto wet coatings becomes permanently encapsulated, creating surface defects. Professional installations control the environment carefully and remove any contaminants immediately. Budget installations in uncontrolled environments often show embedded dust and debris.
Penntek certification requires installers to complete rigorous training in proper application techniques, environmental monitoring, and quality control. Certified installers understand the science of coating application, recognize when conditions aren't suitable, and possess the skills to execute flawless installations.
This expertise explains why professional installations cost more—you're paying for accumulated knowledge and refined skills that prevent the application errors amateur installers make. The few hundred dollars saved using uncertified installers often costs thousands in premature failure and re-coating requirements.
The final common mistake involves proceeding with coating installation without properly assessing and addressing concrete substrate condition and history. Concrete quality varies dramatically based on age, original construction practices, subsequent damage, and environmental exposure. Ignoring these substrate factors creates failures even when preparation and application are otherwise adequate.
Concrete Age and Cure Status: Newly-poured concrete continues curing for weeks or months, releasing moisture and developing strength. Coating concrete too soon traps moisture and prevents complete cure, causing coating failure and substrate problems. Most coating manufacturers recommend waiting 28-60 days after concrete placement before coating application.
Yet homeowners building new homes often schedule coating immediately after occupancy without realizing concrete hasn't fully cured. The coating fails within months as trapped moisture and ongoing cure cause problems.
Previous Coatings or Sealers: Many garages have been previously sealed, painted, or coated. Complete removal of all previous coatings is essential—yet contractors sometimes apply new coatings over old sealers or previous failed coatings without complete removal.
New coating bonds to old coating/sealer rather than concrete. When the old material fails (which it will), the new coating fails simultaneously. We've removed failed "new" coatings only to discover they were applied over previous failed coatings—double failure.
Concrete Hardness Variations: Concrete hardness varies based on mix design, age, curing conditions, and weathering. Soft concrete requires different grinding approach than hard concrete. Very hard concrete may require specialized diamonds and more aggressive grinding.
Installers who don't assess concrete hardness may under-grind hard concrete (inadequate profile) or over-grind soft concrete (excessive surface erosion). Both create coating adhesion problems.
Structural Cracks vs. Surface Cracks: Not all cracks are equal. Some are shallow surface cracks requiring simple repair. Others are structural cracks indicating foundation problems, requiring engineering assessment before coating proceeds.
Coating over active structural cracks without proper repair creates guaranteed failure as crack movement telegraphs through coatings and causes progressive delamination.
Chemical Contamination History: Garage floors in shops, auto facilities, or industrial spaces may have deep chemical contamination from years of oil, solvent, or chemical exposure. Surface grinding removes surface contamination but may not reach deep contamination that gradually migrates back to the surface.
Coating over deeply contaminated concrete without specialized treatment creates time-delayed failure as contamination reaches the coating interface and interferes with adhesion.
Coating Over Active Moisture Issues: Garages with visible efflorescence (white crystalline deposits), water stains, or obvious moisture problems require moisture source identification and correction before coating. Yet contractors sometimes apply coatings over active moisture issues, promising that their "moisture-resistant" coating will solve the problem.
Coating doesn't stop moisture—it traps moisture beneath the coating where it causes blistering and delamination. The moisture problem must be addressed at the source (drainage, water table, foundation sealing) before coating can succeed.
Ignoring Foundation Settlement: Garages experiencing ongoing foundation settlement develop cracks and slab movement. Coating these floors without addressing settlement creates coating failure as slab movement stresses and breaks the coating.
Professional assessment identifies settlement signs and recommends addressing structural issues before coating application. Budget contractors apply coatings without structural assessment, leading to predictable failure.
Coating Over Deteriorated Concrete: Concrete deteriorated by freeze-thaw damage, chemical attack, or poor original mix requires repair or replacement—not coating. Coating doesn't fix deteriorated concrete—it temporarily hides deterioration that continues beneath the coating.
We've assessed installations where contractors applied coating over spalding, deteriorated concrete. The coating looked good briefly but failed within months as underlying deterioration progressed.
Understanding the financial impact of installation failures helps homeowners evaluate the true cost of budget installations versus professional work:
Failed DIY Epoxy Installation:
Failed Budget Contractor Installation:
Professional Penntek Installation Initially:
The math is clear: the "cheap" option becomes expensive when it fails prematurely. Professional installation costs less over any reasonable timeframe.
Our systematic approach specifically addresses every common failure mode:
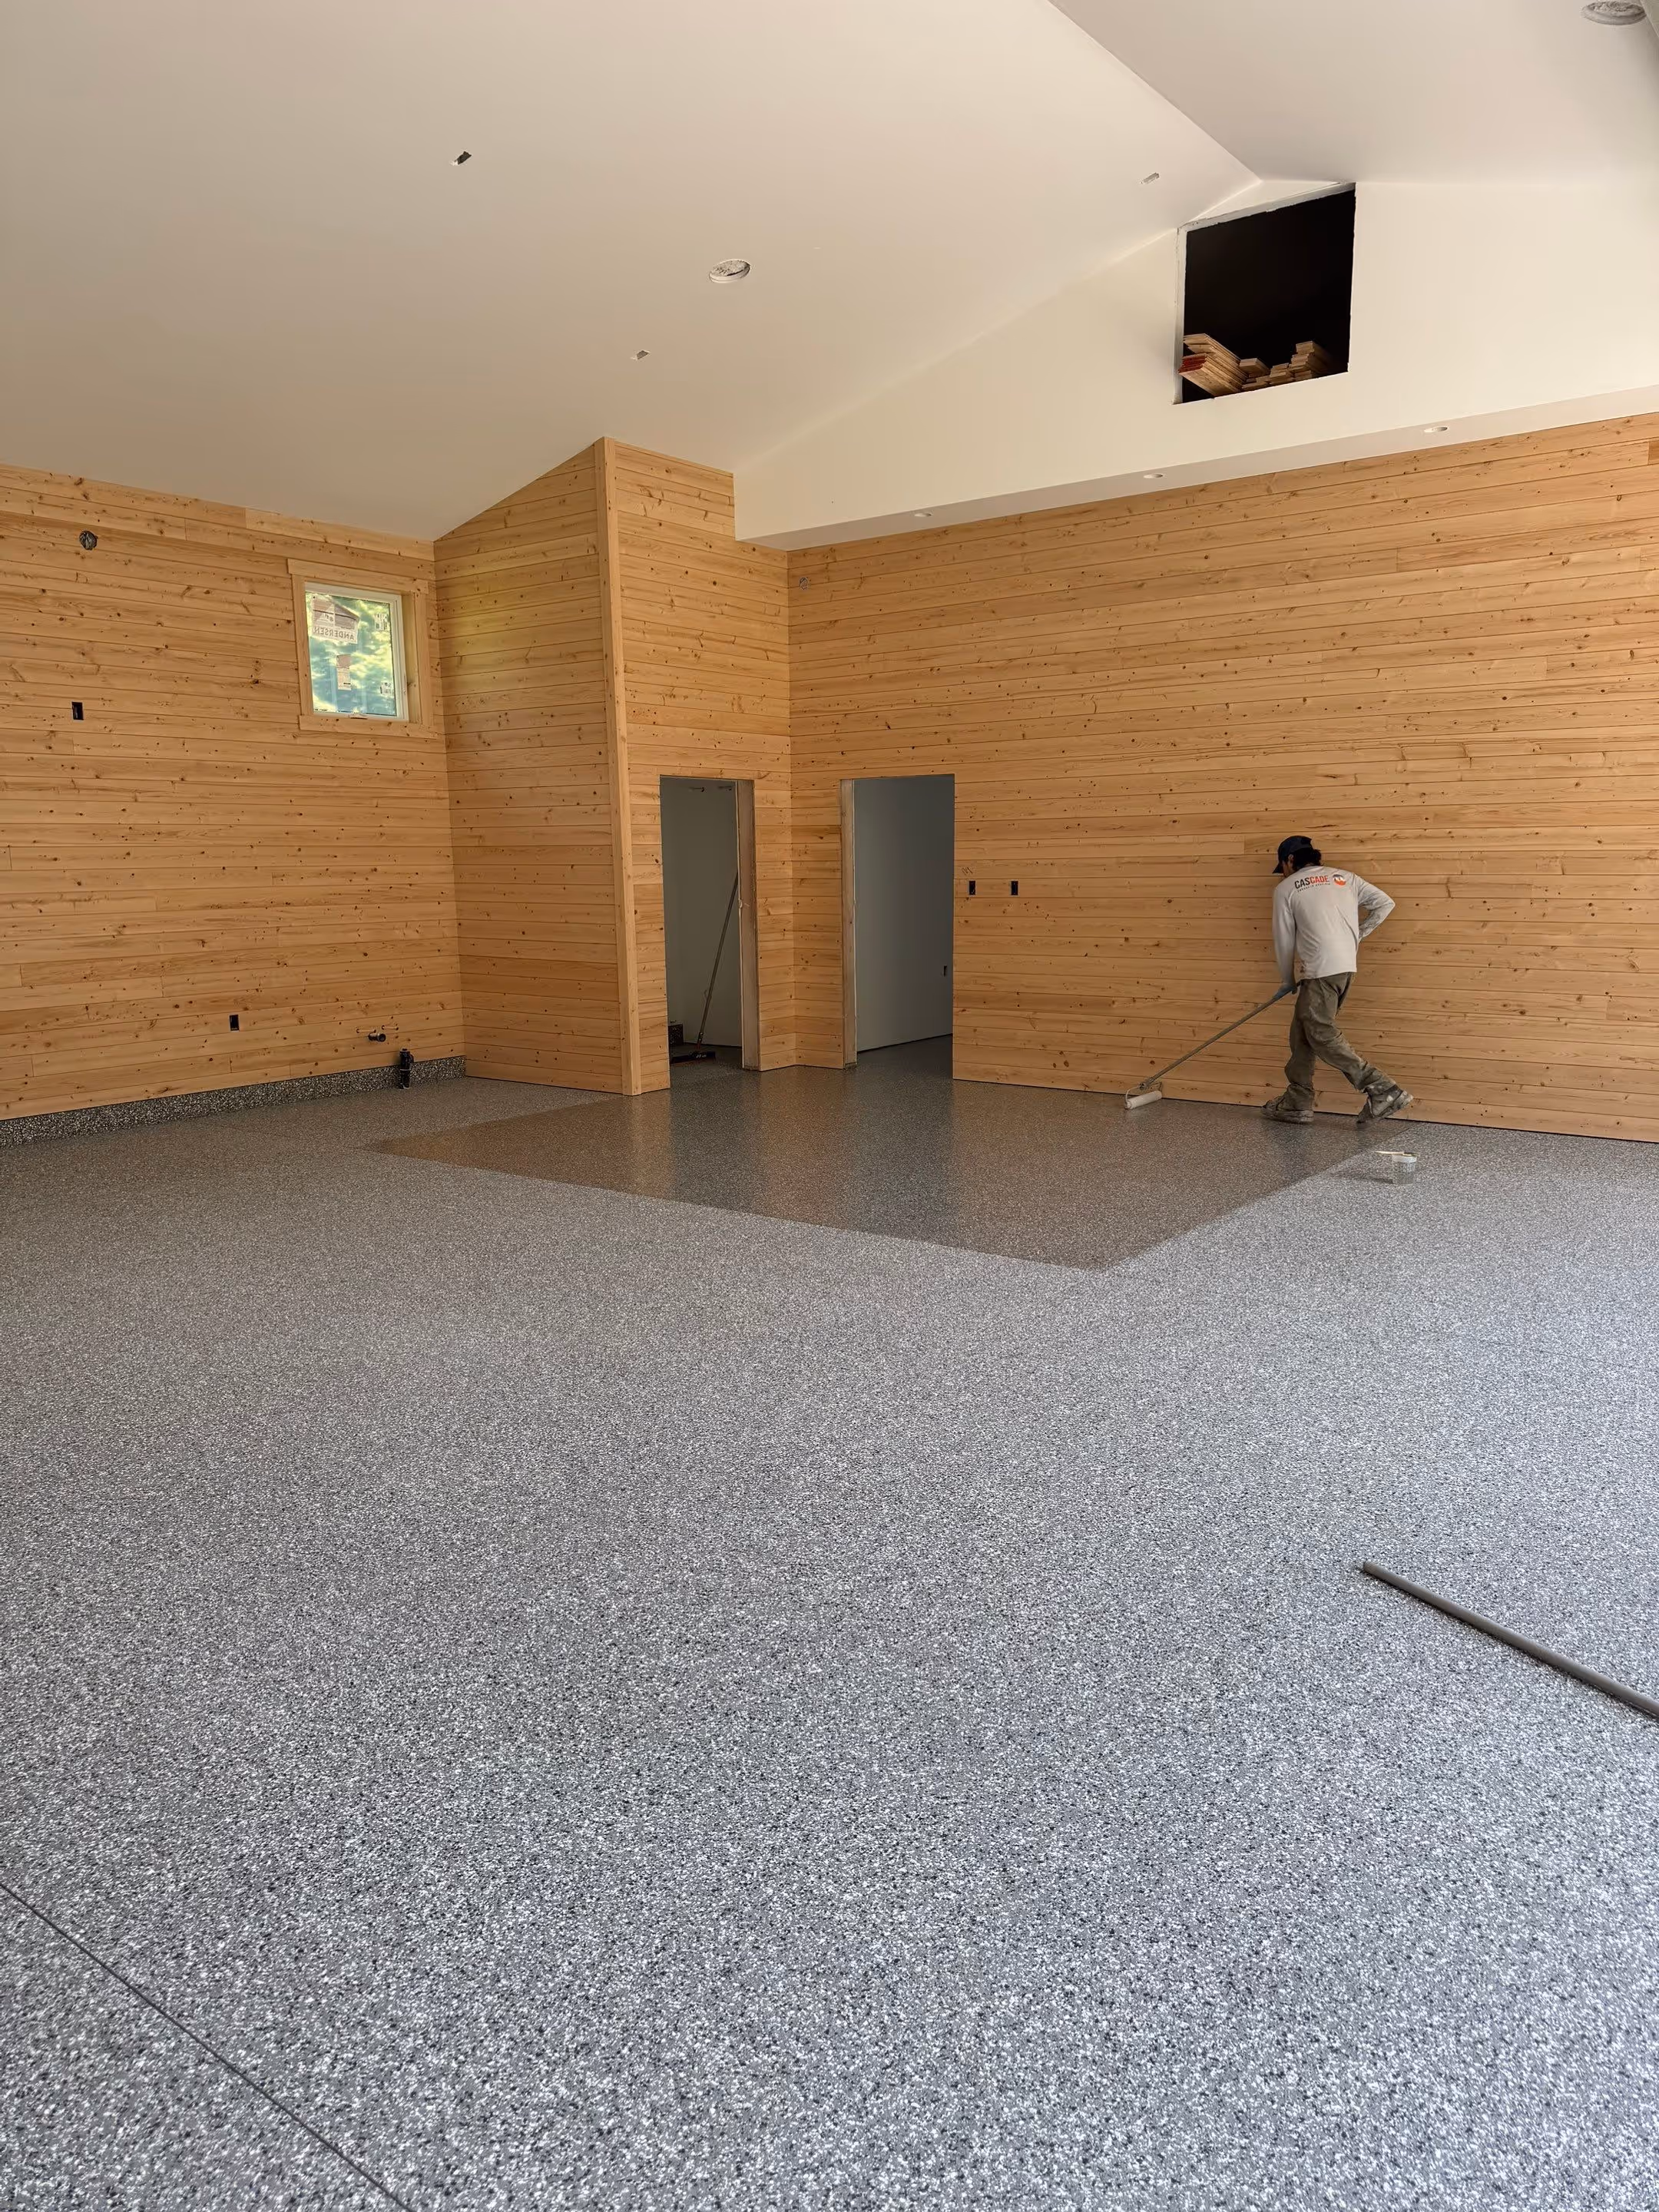
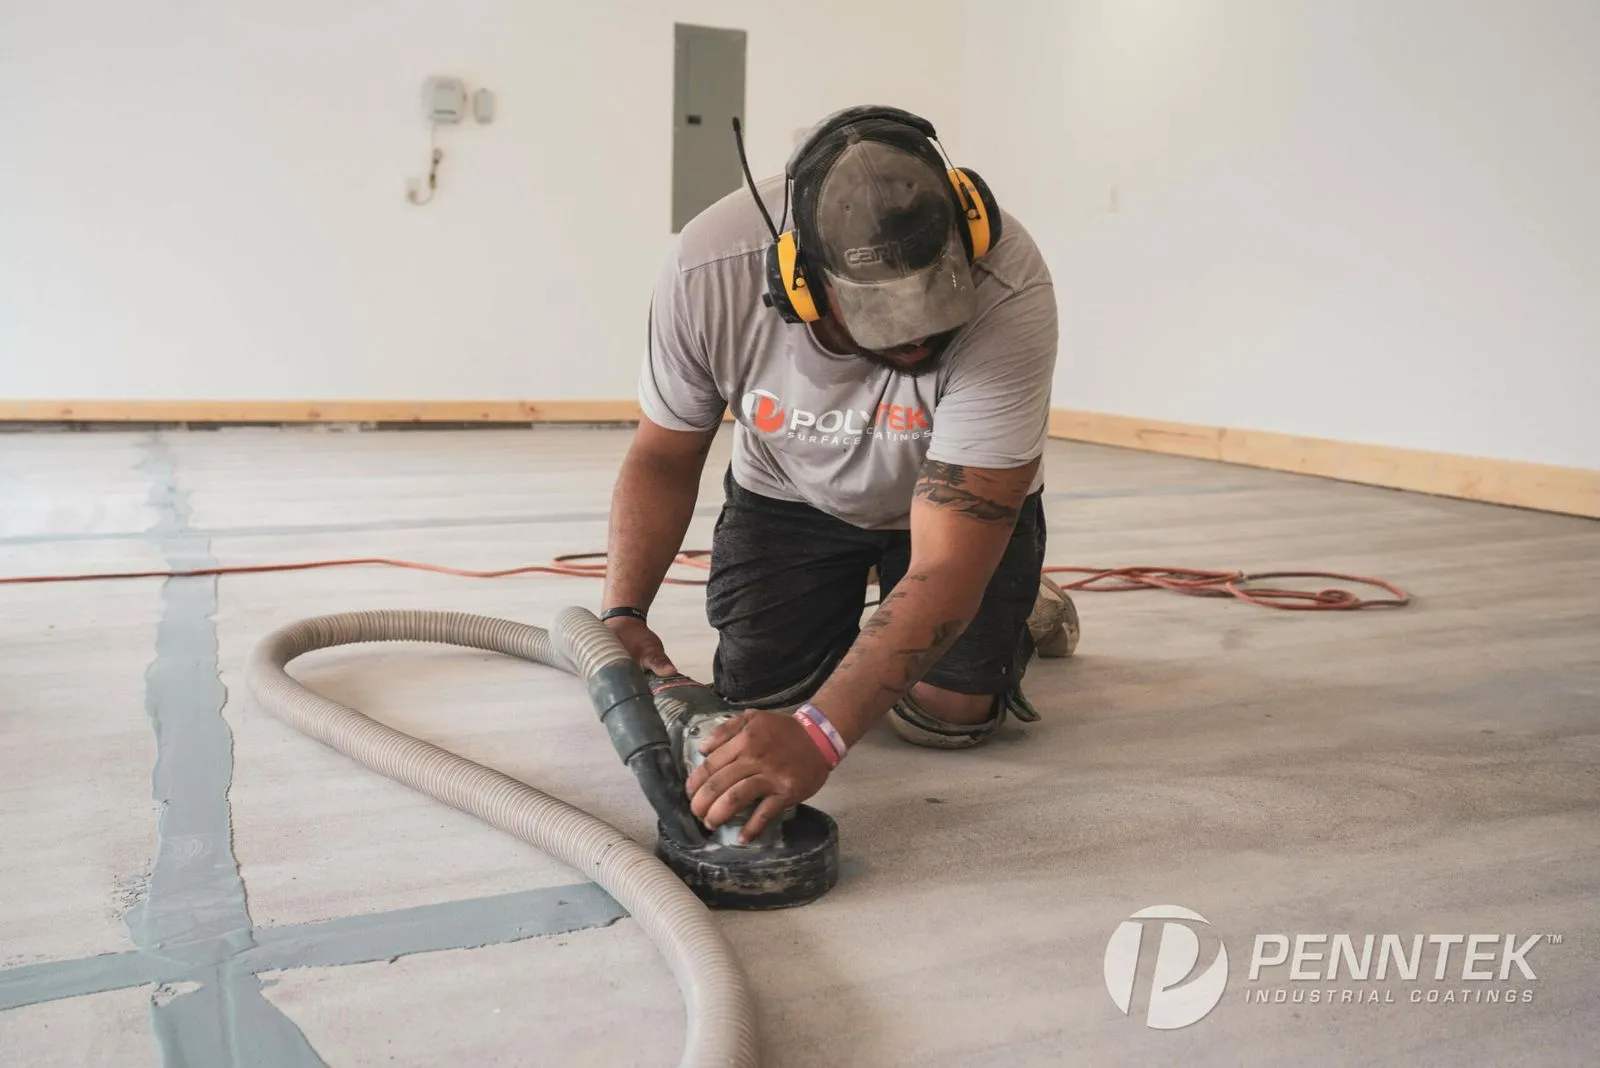
Comprehensive Surface Preparation: We use commercial-grade 600+ pound grinders with diamond tooling, making multiple passes to achieve proper ICRI profile 2-3 texture. Every square inch receives attention, including edges, corners, and detail areas. We never rush preparation—it's too critical to coating performance.
Mandatory Moisture Testing: Every installation includes calcium chloride moisture testing using calibrated equipment and industry-standard protocols. When testing reveals elevated moisture, we select appropriate moisture-management solutions rather than proceeding with standard systems.
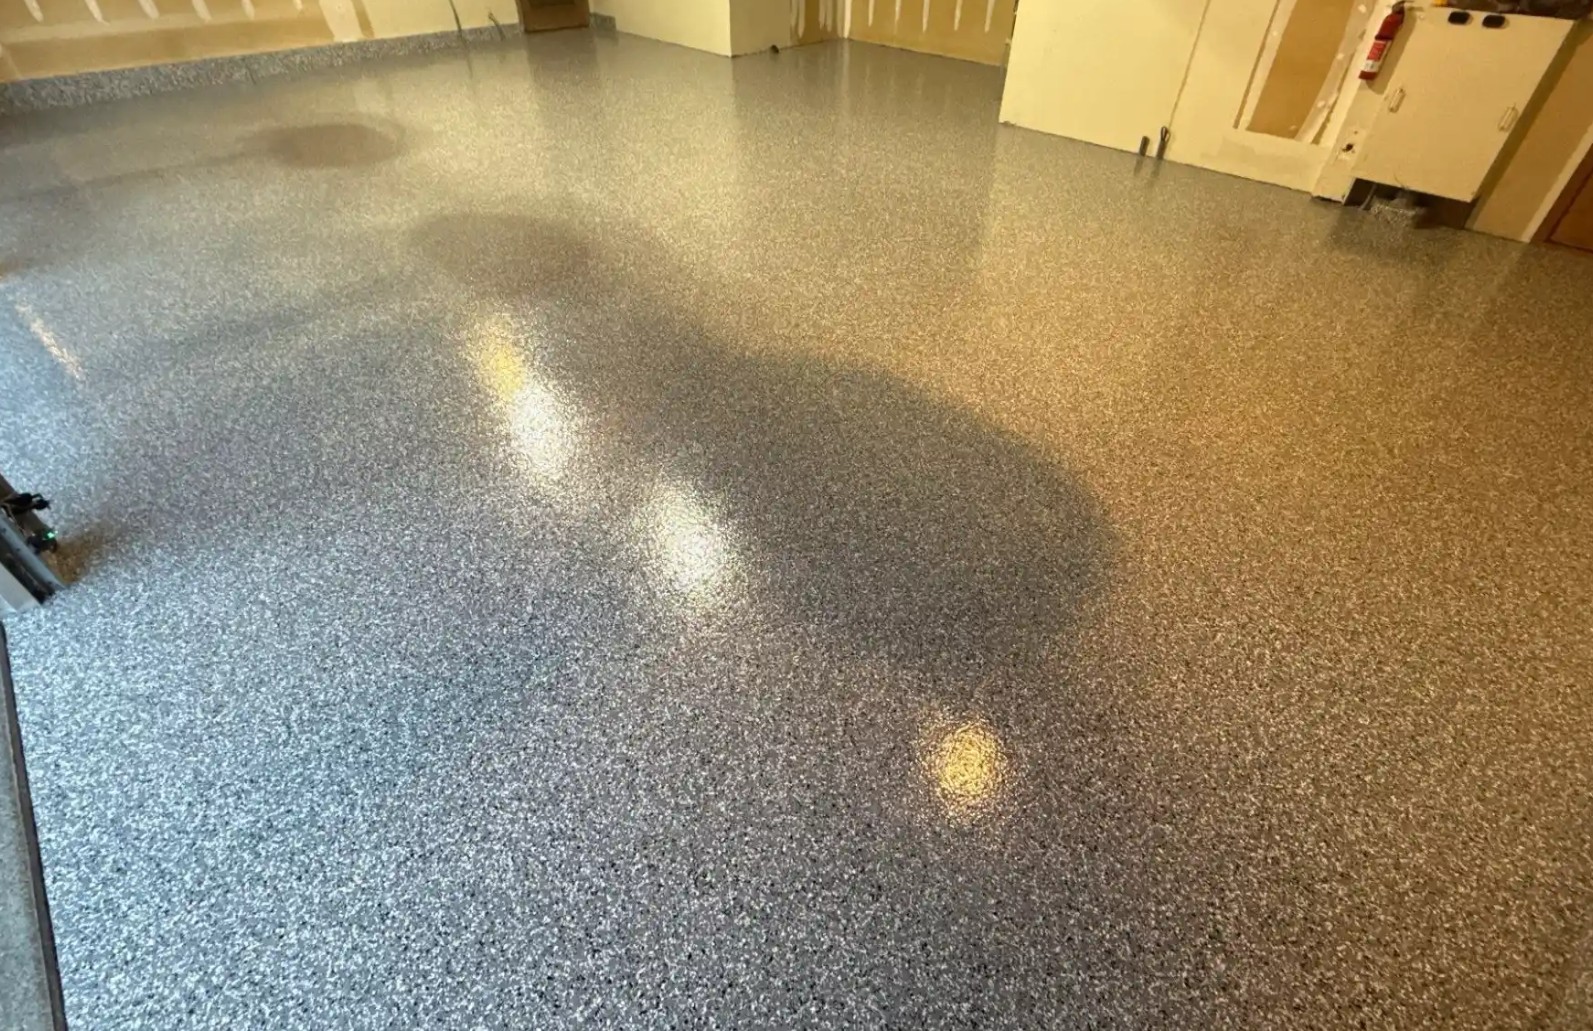
Premium Penntek Chemistry: We exclusively install pure Penntek polyurea formulations—99% solids, chemical bonding, superior flexibility, FadeLock UV protection, and all the performance advantages that create 30-40 year lifespans.
Certified Installer Expertise: Our installers maintain Penntek certification requiring ongoing training in preparation techniques, application methods, environmental monitoring, and quality control. They understand the science behind successful installations and possess the refined skills that prevent application errors.
Thorough Substrate Assessment: Before quoting projects, we assess concrete condition, history, and any factors that might affect coating success. We identify and discuss any concerns candidly, recommending solutions before proceeding with installation.
Comprehensive Warranties: Every installation includes Penntek's limited lifetime warranty covering both product and installation. This warranty transfers to subsequent property owners, protecting your investment whether you stay in your home for decades or sell in a few years.
If you're reading this because you're dealing with a failed garage floor coating in Bothell, Woodinville, Kirkland, Redmond, or surrounding areas, here's our recommendation:
Stop Making It Worse: Don't apply additional coatings over failing coatings. Don't attempt DIY repairs. These temporary fixes rarely work and make professional correction more difficult and expensive.
Get Professional Assessment: Contact us for a complimentary failed coating assessment. We'll identify why the coating failed, whether substrate damage exists, and what's required for proper correction. This assessment costs nothing and provides valuable information.
Complete Removal and Proper Re-Installation: Failed coatings must be completely removed before re-coating. We use specialized grinding equipment to remove all failed coating material and prepare the substrate properly. Then we assess moisture, test concrete conditions, and install Penntek using the systematic approach that prevents future failure.
Understand That Starting Over Costs Less Than Repeated Failures: Homeowners who've experienced multiple coating failures sometimes hesitate to invest in professional installation, concerned about spending more money after previous disappointments. We understand completely. However, repeated budget installations ultimately cost far more than doing it right once with Penntek.
Whether you're planning your first garage floor coating or replacing a failed coating, understanding these common mistakes helps you make informed decisions:
Ask Potential Contractors Specific Questions:
Beware of These Red Flags:
Consider Professional Penntek Installation:If you want coating that lasts decades rather than years, professional Penntek installation provides the only reliable path. The upfront investment is higher, but the lifetime cost is dramatically lower while avoiding the repeated inconvenience of coating removal and re-installation every few years.
Contact Cascade Concrete Coatings for a complimentary consultation. We'll assess your garage, explain exactly what's required for successful long-term coating performance, and provide a detailed quote for professional Penntek installation.
You don't have to make the same mistakes hundreds of homeowners before you have made. Learn from their expensive lessons and choose the professional installation approach that prevents problems rather than attempting to fix them after failure occurs.
Your garage deserves better than the budget coating installations that fail in 2-3 years. Professional Penntek installation costs more initially but costs less over any timeframe beyond five years while eliminating the frustration of repeated coating failures. Make the decision that protects your investment and saves you money long-term.
Schedule your free consultation today and discover the difference professional expertise makes.